LEGO MOC Lighting: Adding LEDs and Effects to Your Creations
Supporting Free Content
When you purchase through our links, we earn a small commission at no extra cost to you. As an Amazon Associate and eBay Partner, this helps us keep bringing you expert LEGO® reviews and guides. Thank you for your support!
LEGO MOC Lighting: Adding LEDs and Effects to Your Creations
Elevating your LEGO creations from static models to dynamic, illuminated masterpieces is an exciting frontier for any builder. LEGO MOC lighting involves integrating specialized LED kits and custom electronic components into your "My Own Creations" (MOCs) to add realism, atmosphere, and captivating visual effects. This guide will walk you through everything you need to know, from choosing the right lighting solutions to expert installation techniques, helping you transform your brick-built worlds with the magic of light.

The Power of Illumination: What is LEGO MOC Lighting and Why Do It?
For dedicated LEGO enthusiasts, building a "My Own Creation" (MOC) is the ultimate expression of creativity. It's about bringing unique visions to life, brick by brick. But what if you could take that vision a step further? What if your bustling LEGO city could glow with streetlights, your majestic castle could shimmer with torchlight, or your intricate spaceship could pulse with engine power?
That's where LEGO MOC lighting comes in. It's the art and science of adding electronic illumination to your custom LEGO builds, transforming them from static displays into vibrant, living scenes. This can range from simple static lights to complex, programmable effects that truly make your MOCs pop.
Why Light Up Your MOCs?
- Enhanced Realism: Just like in the real world, light brings objects to life. Streetlights, building interiors, vehicle headlights, and glowing signage instantly add a layer of authenticity to your models.
- Atmosphere and Mood: Lighting is a powerful tool for setting a scene. Warm, flickering lights can evoke a cozy cottage, while cool, stark blues can create a futuristic sci-fi vibe.
- Focal Point Creation: Strategic lighting can draw the eye to specific details or areas of your MOC, highlighting intricate designs or important narrative elements.
- Storytelling: Lights can tell a story. A flashing police car, a glowing lava flow, or a dim, mysterious alleyway can all deepen the narrative of your creation.
- Dynamic Display: Beyond static illumination, effects like flashing, pulsing, or sequential lights add dynamic movement and excitement, making your MOC a true spectacle.
- Unleash Creativity: Integrating lighting challenges you to think differently about your build, encouraging innovative solutions for hiding wires and incorporating light sources seamlessly.
Exploring LEGO Lighting Solutions: Kits vs. DIY
When it comes to illuminating your MOCs, you generally have two main paths: pre-made dedicated lighting kits or a fully custom, do-it-yourself (DIY) approach. Each has its own advantages and is suited for different levels of technical comfort and desired customization.
Dedicated LEGO Lighting Kits
These kits are designed specifically for LEGO models, offering a convenient and often plug-and-play solution. Major brands in this space, such as Lightailing, Briksmax, Light My Bricks, and Game of of Bricks, provide kits for official LEGO sets, but their components (individual LEDs, light strips, and power boards) are often compatible and perfect for MOCs too. You can find a vast array of dedicated LEGO lighting kits readily available.
-
Pros:
- Ease of Use: Often come with clear instructions and pre-wired components, making installation straightforward for beginners.
- Compatibility: Designed to fit seamlessly within LEGO bricks and structures.
- Reliability: Typically tested and optimized for safe use with LEGO.
- Variety: A wide range of specific lights (e.g., streetlights, spotlights, flickering effects) are often included.
-
Cons:
- Less Customization: While versatile, they offer less flexibility than DIY solutions for unique effects or non-standard placements.
- Cost: Can be more expensive than sourcing individual components, especially for large MOCs.
- Proprietary Connectors: Some brands use unique connectors, limiting inter-compatibility.
DIY Custom LED Solutions
For builders who love to tinker and desire ultimate control, a DIY approach using individual LEDs and basic electronics components is the way to go. This path offers unparalleled customization but requires a bit more technical knowledge, potentially involving soldering and basic circuit understanding.
-
Components You Might Use:
- Individual LEDs: Micro LEDs (pico LEDs) are incredibly tiny and perfect for fitting into tight spaces, like inside a minifigure accessory or a single stud. Standard 3mm or 5mm LEDs are also common. You can find a selection of micro LEDs to get started.
- LED Strips: Flexible strips of LEDs, often self-adhesive, are great for backlighting, illuminating large areas, or creating continuous lines of light (e.g., building facades). Look for LED strip lights that are thin and easy to cut.
- Wires: Ultra-thin enamel wire or ribbon cables are crucial for discreet routing.
- Resistors: Essential for protecting LEDs from too much current.
- Power Sources: Battery packs (AA, AAA, coin cell) or USB power banks/adapters.
- Controllers: Simple on/off switches, dimmer modules, or advanced microcontrollers like Arduino or Raspberry Pi for programmable effects.
- Breadboards/PCBs: For prototyping and creating more permanent circuits.
-
Pros:
- Ultimate Customization: Design any effect, place lights exactly where you want them, and integrate unique functionalities.
- Cost-Effective: Can be cheaper for large-scale projects if you buy components in bulk.
- Learning Opportunity: A fantastic way to learn about electronics, circuitry, and programming.
-
Cons:
- Requires Technical Skill: Soldering, understanding voltage/current, and circuit design might be necessary.
- Time-Consuming: More planning and execution time is involved.
- Potential for Error: Incorrect wiring can damage components or be a fire hazard if not done properly (always prioritize safety!).
Choosing the Right Lighting: Key Factors to Consider
Before diving into installation, making informed decisions about your lighting components is crucial. Here's what to think about:
Brightness and Color
- Warm White vs. Cool White: Warm white (around 2700K-3000K) LEDs emit a soft, yellowish glow, perfect for interiors, vintage scenes, or cozy atmospheres. Cool white (5000K-6500K) LEDs provide a crisp, bluish-white light, ideal for modern buildings, laboratories, or futuristic settings.
- RGB LEDs: These can display a full spectrum of colors, often controlled by a remote or app, offering incredible versatility for dynamic color changes and mood setting.
- Brightness: Consider the scale of your MOC and the desired effect. Too bright can be overwhelming; too dim might be lost. Look for LEDs with appropriate lumen ratings.
Power Source and Management
The reliability and longevity of your lighting depend heavily on your power solution.
- USB Power: Convenient if your MOC is near a computer or wall adapter. Many kits use USB.
- Battery Packs: Offer portability, great for MOCs that need to be moved or displayed away from outlets. Consider AA/AAA packs for larger projects or coin cells for tiny, isolated lights.
- AC Adapters: Best for permanent displays, providing consistent power without battery changes. Ensure the voltage and amperage match your lighting system's requirements.
Wire Management
The bane of many a MOC builder! Thin, flexible wires are paramount. Look for kits that use ultra-thin wires or consider purchasing fine gauge enamel wire for DIY projects. Flat ribbon cables can also be useful for routing under plates.
Compatibility and Fit
Ensure your chosen LEDs and wires can be seamlessly integrated into your LEGO structure without forcing bricks or creating unsightly gaps. Micro LEDs are often preferred for their tiny footprint.
Desired Effects and Control
Do you just want simple on/off, or do you envision more dynamic displays?
- Static On/Off: Simplest, often controlled by a switch.
- Dimming: Allows you to adjust brightness, creating subtle changes in mood.
- Flashing/Pulsing: Perfect for emergency lights, fires, or engine glows.
- Sequential: Lights that turn on or off in a pattern, ideal for runways, signs, or moving vehicles.
- Remote/App Control: For advanced systems, allowing you to change colors, effects, and brightness remotely.
Durability and Safety
Always prioritize quality components. Ensure wires are properly insulated, connections are secure, and LEDs don't overheat. While LEGO bricks are non-conductive, poorly managed electronics can still pose risks. Look for certified products and follow safety guidelines for DIY projects.
Budget
Pre-made kits can range from $20 for a small set to hundreds for a large, complex one. DIY costs depend on the scale and complexity, but bulk purchases of components can be very economical.
Installation Techniques for Seamless Integration
Integrating lights into your LEGO MOCs requires patience, precision, and a bit of ingenuity. The goal is to make the lighting appear as if it's an intrinsic part of the model, not an afterthought.
1. Plan Your Lighting Layout
Before you even begin, meticulously plan where each light will go and how its wires will be routed. Sketch out your MOC or use digital building software to visualize the pathways. Consider where the power source will be located and how it will be accessed.
2. Test Components Before Installation
Always test your LEDs, wires, and power source before embedding them into your MOC. It's much easier to troubleshoot a loose component than one that's already hidden deep within your build.
3. Integrate During Building or Carefully Disassemble
The easiest time to add lighting is often as you build your MOC. This allows you to route wires and place LEDs naturally within the structure. If your MOC is already complete, you'll need to carefully disassemble sections, install the lights, and then reassemble.
4. Master the Art of Hiding Wires
This is arguably the most challenging aspect of MOC lighting, but crucial for a clean look.
- Under Plates: Many lighting kits use wires thin enough to run between studs and under plates without causing stress or gaps.
- Through Hollow Studs: Some larger studs are hollow, providing a perfect channel for thin wires.
- Within Brick Gaps: Carefully run wires through existing gaps in bricks or between layers.
- Using Transparent Bricks: For subtle diffusion, you can sometimes house an LED inside a clear or translucent LEGO brick.
- Custom Channels: For advanced builders, you might design specific sections of your MOC to act as wire channels.
5. Securing LEDs
LEDs need to stay in place.
- Friction Fit: Many micro LEDs are small enough to be held by the natural friction of LEGO elements.
- Adhesive: A tiny dot of super glue or hot glue can secure an LED, but be careful not to obscure the light or damage the brick.
- Custom Brick Modifications: While generally discouraged for purists, some builders carefully drill small holes in non-essential bricks to pass wires or embed LEDs. Proceed with caution and at your own risk.
6. Connecting to Power and Control
Once all your LEDs are in place and wired, connect them to your power source via a distribution board or directly if using a simple circuit. Ensure all connections are secure and properly insulated. If you're using a controller, integrate it into an accessible part of your MOC.
Advanced Lighting Effects and Control
Beyond simple on/off, modern lighting solutions offer a plethora of dynamic effects to truly animate your LEGO MOCs.
Dimming and Brightness Control
Allows you to adjust the intensity of your lights, creating subtle atmospheric shifts. Imagine a cityscape gradually dimming as night falls, or a spotlight slowly increasing in intensity on a prized display piece. Many kits include dimmer modules, or you can integrate potentiometers into DIY setups.
Flashing and Pulsing Effects
Essential for adding action and realism:
- Emergency Vehicles: Red and blue flashing lights for police cars, ambulances, or fire trucks.
- Flickering Flames: Replicate the warm, dancing glow of a campfire, torch, or fireplace.
- Engine Glow: A pulsating red or blue light for a spaceship's thrusters or a futuristic vehicle's engine.
Sequential Lighting
Lights that turn on and off in a specific order, creating a sense of movement or progression:
- Runway Lights: Guiding planes on a LEGO airport runway.
- Marquee Signs: Classic theater or shop signs with lights chasing each other.
- Building Animations: Lights moving across a building facade.
Sound Activation and Sensors
Advanced setups can incorporate microphones or other sensors to trigger lighting effects. Imagine lights flashing to the beat of music, or a motion sensor activating lights as a minifigure approaches.
Remote Control and App Integration
Many high-end lighting kits come with remote controls, or even Bluetooth/Wi-Fi modules that allow you to control your lights via a smartphone app. This offers unparalleled convenience for changing colors, effects, and brightness without physically interacting with your MOC.
Microcontrollers (Arduino/Raspberry Pi)
For the ultimate in customization, microcontrollers like Arduino or Raspberry Pi allow you to program complex, multi-channel lighting sequences and integrate various sensors and inputs. This is ideal for ambitious projects like a bustling, interactive LEGO city, perhaps built around a or PRODUCT_LINK[Item Number: 9452-1] base, where streetlights turn on at dusk, traffic lights cycle, and buildings light up randomly. For a dynamic display like a PRODUCT_LINK[Item Number: 3724-1], you could program glowing eyes and pulsating "fire breath" effects.
Featured LEGO Sets to Inspire Your Lit MOCs
While the focus is on MOC lighting, many official LEGO sets provide fantastic canvases for customization and inspiration. Here are some sets that would be dramatically enhanced by lighting, sparking ideas for your own creations:
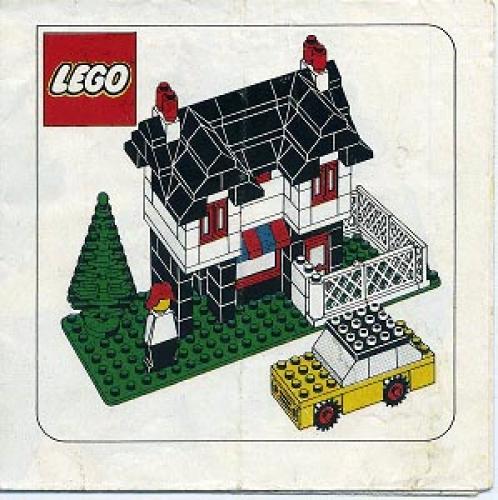
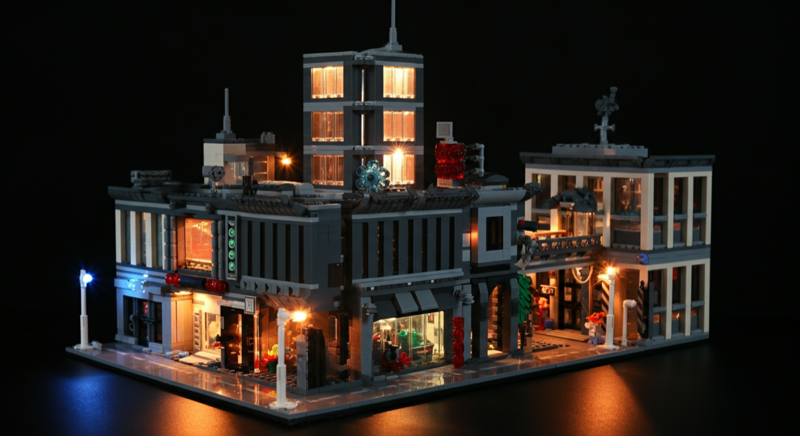
- Modular LEGO Store: Imagine this iconic building with illuminated display windows, glowing LEGO signage, and interior lighting revealing all the delightful details. It's a prime candidate for a vibrant street scene MOC.
- Bonus Lego Basic Town: This set, with its generous 2542 pieces, is a perfect foundation for a sprawling MOC city. Envision streetlights lining every avenue, traffic lights controlling intersections, and every building's interior gently lit up, creating a truly living urban landscape.
- Giant Lego Topic Set: With 2195 pieces, this universal building set offers immense creative potential for large-scale MOCs. Whether it's a bustling town, a futuristic colony, or a historical diorama, the sheer size provides ample opportunity to integrate extensive lighting, from ambient glows to detailed spotlights.
- Lego Minifigure: This large-scale Minifigure could become a striking statue in a lit plaza or a centerpiece in a themed display. Imagine spotlights highlighting its contours or even subtle internal lighting giving it a futuristic glow.
- Lego Dragon: A magnificent beast like this LEGO Dragon, with its 1535 pieces, cries out for dramatic lighting. Think glowing eyes, an internal light to simulate fire breath, or even illuminated scales to make it truly fearsome and majestic.
- Lego Mosaic Dino, Lego Mosaic Cat, and Lego Mosaic Johnny Thunder: While mosaics are flat art pieces, they can be incredibly striking when backlit. Imagine mounting these intricate mosaic artworks on a transparent panel with LEDs behind them, creating a vibrant, glowing art installation for your wall or display.
- LEGO Campus: An architectural marvel like the LEGO Campus would be stunning with internal office lights, exterior facade lighting, and perhaps illuminated pathways. It's an ideal subject for showcasing subtle, sophisticated lighting design.
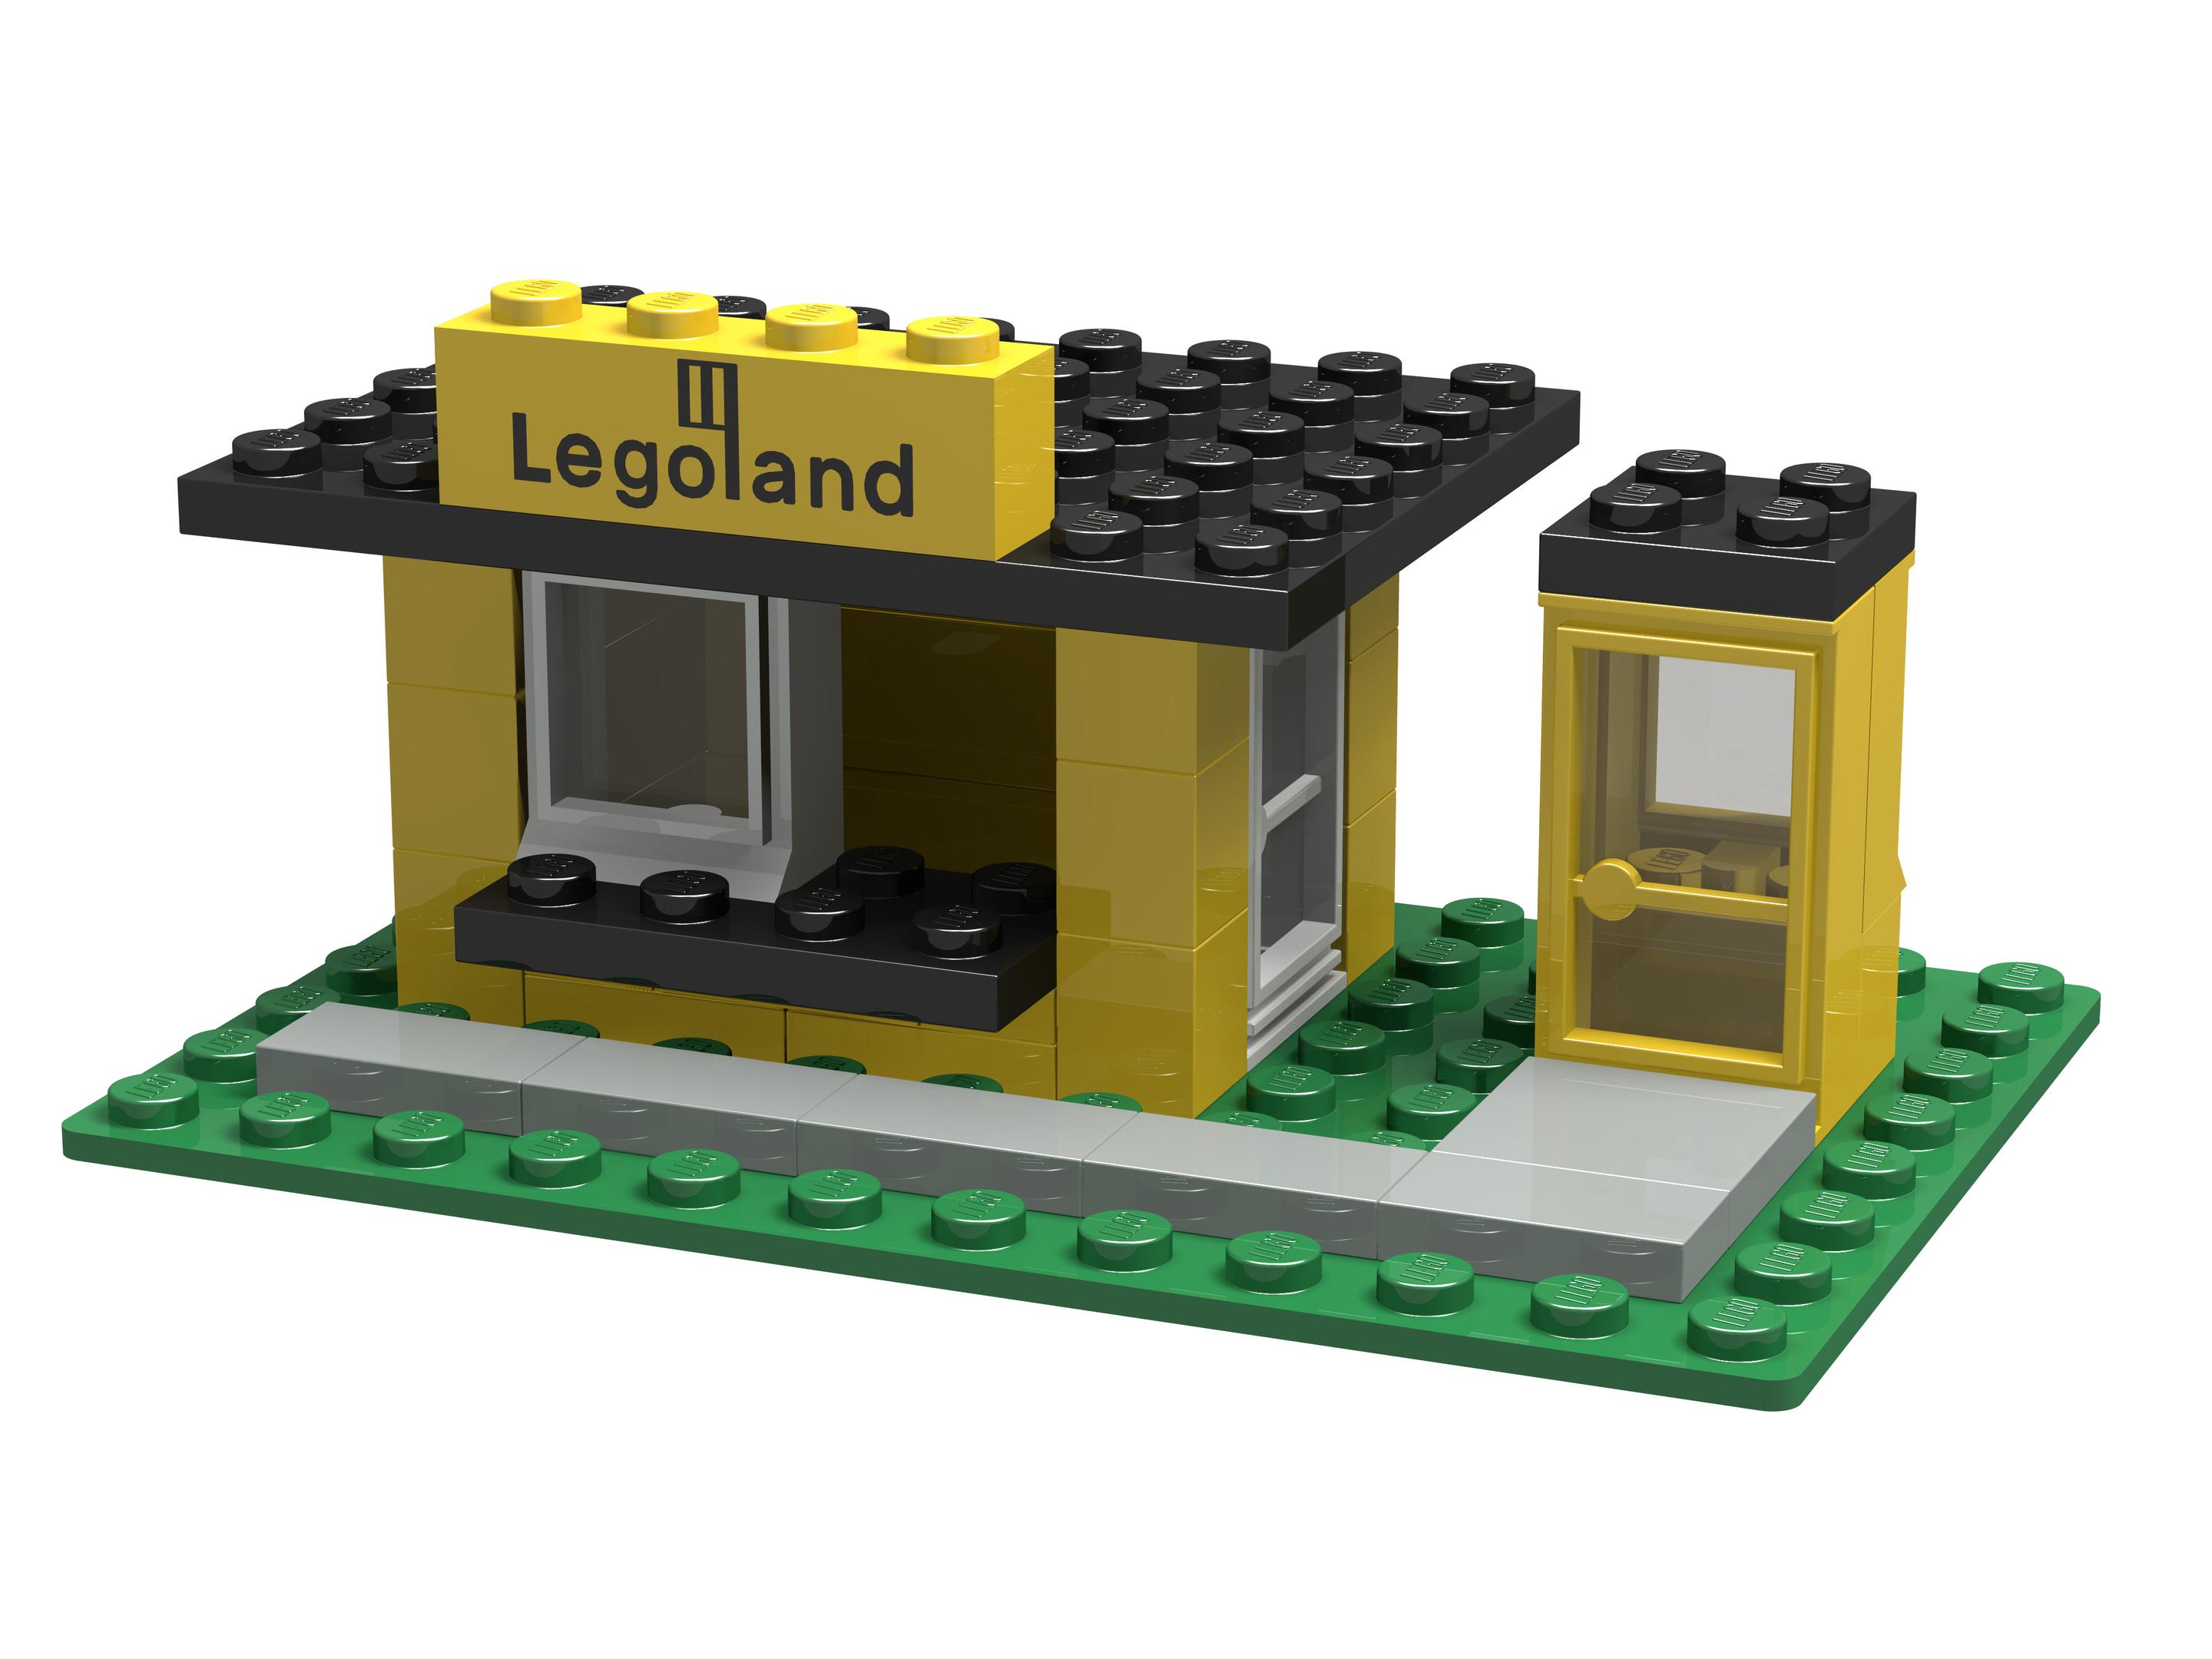
- LEGOLAND Park: Recreating a miniature amusement park offers endless opportunities for lighting. Think illuminated roller coaster tracks, glowing Ferris wheels, bright arcade lights, and charming path lighting throughout the park.
Quick Comparison Table: Lighting Solutions for Your MOCs
To help you decide between different approaches, here's a quick comparison of key features across general lighting solutions:
| Feature | DIY Components (Advanced) | Basic Lighting Kit (Beginner) | Advanced Lighting Kit (Intermediate) |
|---|---|---|---|
| Customization Level | Highest: Unlimited control over light placement, color, effects, and integration with other electronics. | Low: Pre-designed for specific sets or general use; limited modification. | Medium: More options for light types, colors, and some programmable effects, but still largely pre-configured. |
| Ease of Installation | Lowest: Requires technical skill (soldering, circuit design); time-consuming. | Highest: Plug-and-play, clear instructions, minimal tools needed. | Medium: Generally easy, but may involve more intricate wiring or module placement. |
| Cost Efficiency | Potentially Lowest: If buying components in bulk for multiple projects. | Medium: Good value for specific sets or small MOCs. | Highest: Can be significantly more expensive due to advanced features and proprietary tech. |
| Technical Skill Required | High: Electronics knowledge, soldering, programming (optional). | Low: Ability to follow instructions and route wires carefully. | Medium: Basic understanding of connections, potentially some app usage. |
| Types of Effects | Any conceivable effect (static, dimming, flashing, pulsing, sequential, sound-activated, interactive). | Static on/off, sometimes simple flicker. | Static, dimming, flashing, pulsing, color change (RGB), often remote/app controlled. |
What to Consider When Buying LEGO MOC Lighting
Making the right purchasing decisions will save you time, frustration, and ensure your MOCs shine exactly how you envision. Keep these factors in mind:
- Your MOC's Theme and Scale: A grand modular building like the will have different lighting needs than a small vehicle or a large mosaic. Consider if you need interior, exterior, spotlights, or ambient lighting. The size of your MOC, like one built from the 2542 pieces of a PRODUCT_LINK[Item Number: 9287-1], will dictate the number of lights and the complexity of the wiring.
- Your Technical Skill Level: Be honest with yourself. If you're new to electronics, a dedicated, easy-to-install kit is a great starting point. If you're comfortable with soldering and basic circuits, DIY offers endless possibilities.
- Desired Effects: Do you want simple static lights, or do you dream of dynamic flashing, pulsing, or color-changing effects? This will guide your choice between basic kits, advanced kits with controllers, or a microcontroller-based DIY system.
- Budget: Lighting solutions range widely in price. Set a budget and research options within that range. Remember that DIY can be cheaper for large projects if you buy components in bulk, but kits offer convenience for a premium.
- Future Expansion: Think about whether you might want to add more lights or advanced features to your MOC later. Some systems are more modular and expandable than others.
- Aesthetics: Consider how visible the wires and power components will be. Opt for ultra-thin wires and discreet power sources for the cleanest look.
Frequently Asked Questions
What does MOC stand for in LEGO?
MOC stands for "My Own Creation." It refers to any LEGO model that a builder has designed and constructed themselves, rather than following official LEGO instructions for a specific set. MOCs are a cornerstone of the adult fan of LEGO (AFOL) community.
Are LEGO lighting kits safe for my bricks?
Reputable LEGO lighting kits are generally safe for your bricks. They are designed with thin wires that should not stress or damage LEGO elements when installed correctly. Always ensure wires are not pinched too tightly and that any adhesive used is safe for plastic. For DIY solutions, proper wiring and power management are crucial to prevent overheating or short circuits.
Can I light up existing LEGO sets, not just MOCs?
Absolutely! Many lighting companies produce kits specifically designed for popular official LEGO sets (e.g., modular buildings, Star Wars ships, Creator Expert vehicles). You can also adapt general lighting components to illuminate almost any existing LEGO set, bringing beloved models like the to life with interior lights and glowing signs.
How do I hide the wires effectively?
Hiding wires is key to a clean, professional look. Strategies include running wires between studs and under plates, threading them through hollow studs or Technic bricks, integrating them into the gaps between brick layers, or even using custom-built channels within your MOC. The thinner the wire, the easier it is to conceal.
What's the difference between warm white and cool white LEDs?
Warm white LEDs emit a yellowish-white light (similar to an incandescent bulb or candlelight), typically around 2700-3000 Kelvin. They are great for creating cozy, vintage, or natural atmospheres. Cool white LEDs emit a bluish-white light (similar to fluorescent lighting or daylight), typically around 5000-6500 Kelvin. They are often used for modern, clinical, or futuristic effects, or where a bright, crisp light is desired.
Do I need to solder for DIY LEGO lighting?
It depends on the complexity of your DIY project. For very simple circuits with pre-wired components or LED strips with connectors, you might avoid soldering. However, for custom arrangements of individual LEDs, combining different components, or building more advanced circuits, soldering will likely be necessary. There are many beginner-friendly soldering kits and tutorials available if you're interested in learning.
How do I power my LEGO lights?
Common power sources include USB cables (connected to a power bank, wall adapter, or computer port), battery packs (AA, AAA, or coin cell batteries), or dedicated AC adapters that plug into a wall outlet. The choice depends on portability needs, desired brightness, and the total power draw of your lighting system.
Conclusion
Adding lighting to your LEGO MOCs is a truly transformative experience, injecting life, drama, and unparalleled realism into your brick-built worlds. Whether you opt for the convenience of a dedicated kit or the boundless possibilities of a DIY approach, the journey of illuminating your creations is a rewarding one. From the subtle glow of a streetlamp in your city to the dramatic, fiery eyes of your dragon, lights amplify every detail and tell a richer story.
Don't let your incredible LEGO creations sit in the dark. Embrace the power of LEDs, explore the various kits and components available, and start bringing your MOCs to vibrant, shining life today. The only limit is your imagination!
Illuminate your LEGO MOCs with our comprehensive guide to LED lighting and effects. Learn about kits, DIY, installation, and transform your creations with stunning light! === METAUse Our Tools to Go Further
Get more insights about the sets mentioned in this article with our free LEGO tools