Web Bluetooth LEGO Controller: JavaScript Code Tutorial
Control a LEGO Technic Hub or another Powered Up hub from a web page with Web Bluetooth and the LEGO Wireless Protocol, with JavaScript for motors, the hub LED, sensors and a complete control page.
Status update, October 2026: this guide is for LEGO Powered Up hubs such as the Technic Hub, which speak the LEGO Wireless Protocol. SPIKE Prime and MINDSTORMS Robot Inventor hubs do not with LEGO's firmware. LEGO Education ended SPIKE Prime and SPIKE Essential sales on June 30, 2026, and LEGO discontinued the MINDSTORMS Robot Inventor app on October 1, 2026; the free Pybricks firmware keeps those hubs programmable from the same Chrome or Edge browser.
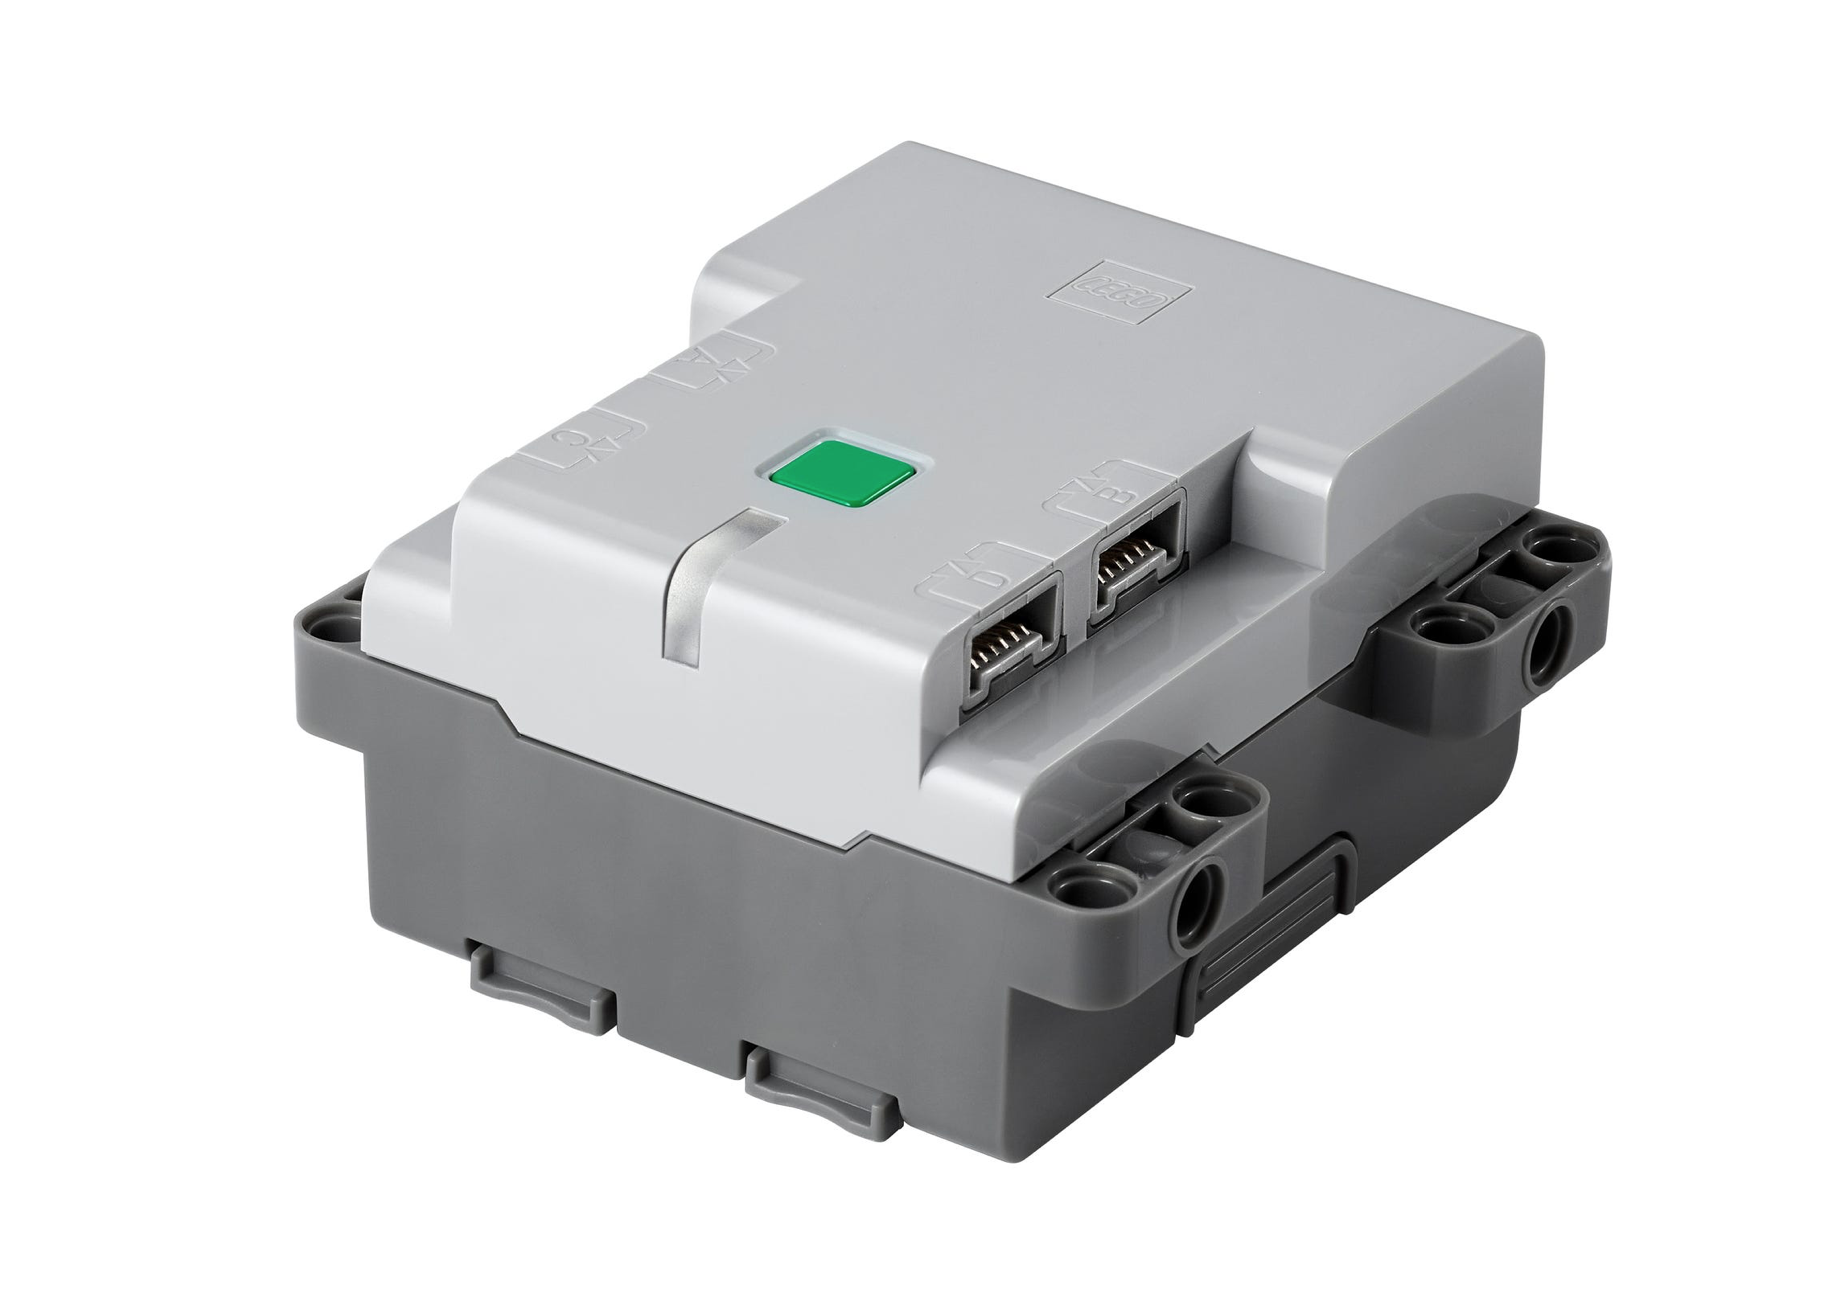
You can control LEGO Powered Up hubs, such as the Technic Hub, the BOOST Move Hub and the SPIKE Essential hub, straight from a web page: Chrome and Edge reach Bluetooth Low Energy devices through the Web Bluetooth API, and these hubs speak LEGO's published Wireless Protocol 3.0. This tutorial builds a browser controller in plain JavaScript, from connecting and sending motor commands to reading sensors and a complete control page, then shows node-poweredup, a library that handles the protocol for you.
Table of Contents
- What is Web Bluetooth?
- Browser & Hub Compatibility
- Initial Setup & Connection
- LEGO Wireless Protocol Basics
- Motor Control Examples
- Reading Sensor Data
- Building a Control Interface
- Using node-poweredup Library
- Troubleshooting
What is Web Bluetooth?
Web Bluetooth is a JavaScript API that enables websites to communicate with Bluetooth Low Energy (BLE) devices. Combined with LEGO's open wireless protocol, it unlocks powerful capabilities:
- ✅ No Installation: Run LEGO controllers directly in a browser
- ✅ Cross-Platform: Works in Chrome and Edge on Windows, macOS, ChromeOS and Android, and in Chrome on Linux behind a flag
- ✅ Custom UIs: Build intuitive control panels with HTML/CSS/JavaScript
- ✅ Live Feedback: Commands go out as you send them, and sensor values arrive as notifications
- ✅ Educational: Teach web development + robotics simultaneously
- ⚠️ Secure Pages Only: The page must be served over HTTPS or from localhost, and connecting always starts from a click
Browser & Hub Compatibility
Supported Browsers
| Browser | Web Bluetooth | Notes |
|---|---|---|
| Chrome | ✅ Windows, macOS, ChromeOS, Android | On Linux, turn on chrome://flags/#enable-experimental-web-platform-features; it also needs kernel 3.19+ and BlueZ 5.41+ |
| Edge | ✅ Desktop | Chromium-based, same API as Chrome |
| Opera | ✅ Desktop | Chromium-based |
| Safari | ❌ macOS, iOS, iPadOS | No Web Bluetooth support |
| Firefox | ❌ All platforms | No Web Bluetooth support |
Compatible LEGO Hubs
- Technic Hub (Control+), with four ports
- Powered Up Hub (the two-port City hub)
- BOOST Move Hub
- SPIKE Essential hub
- DUPLO Train Base
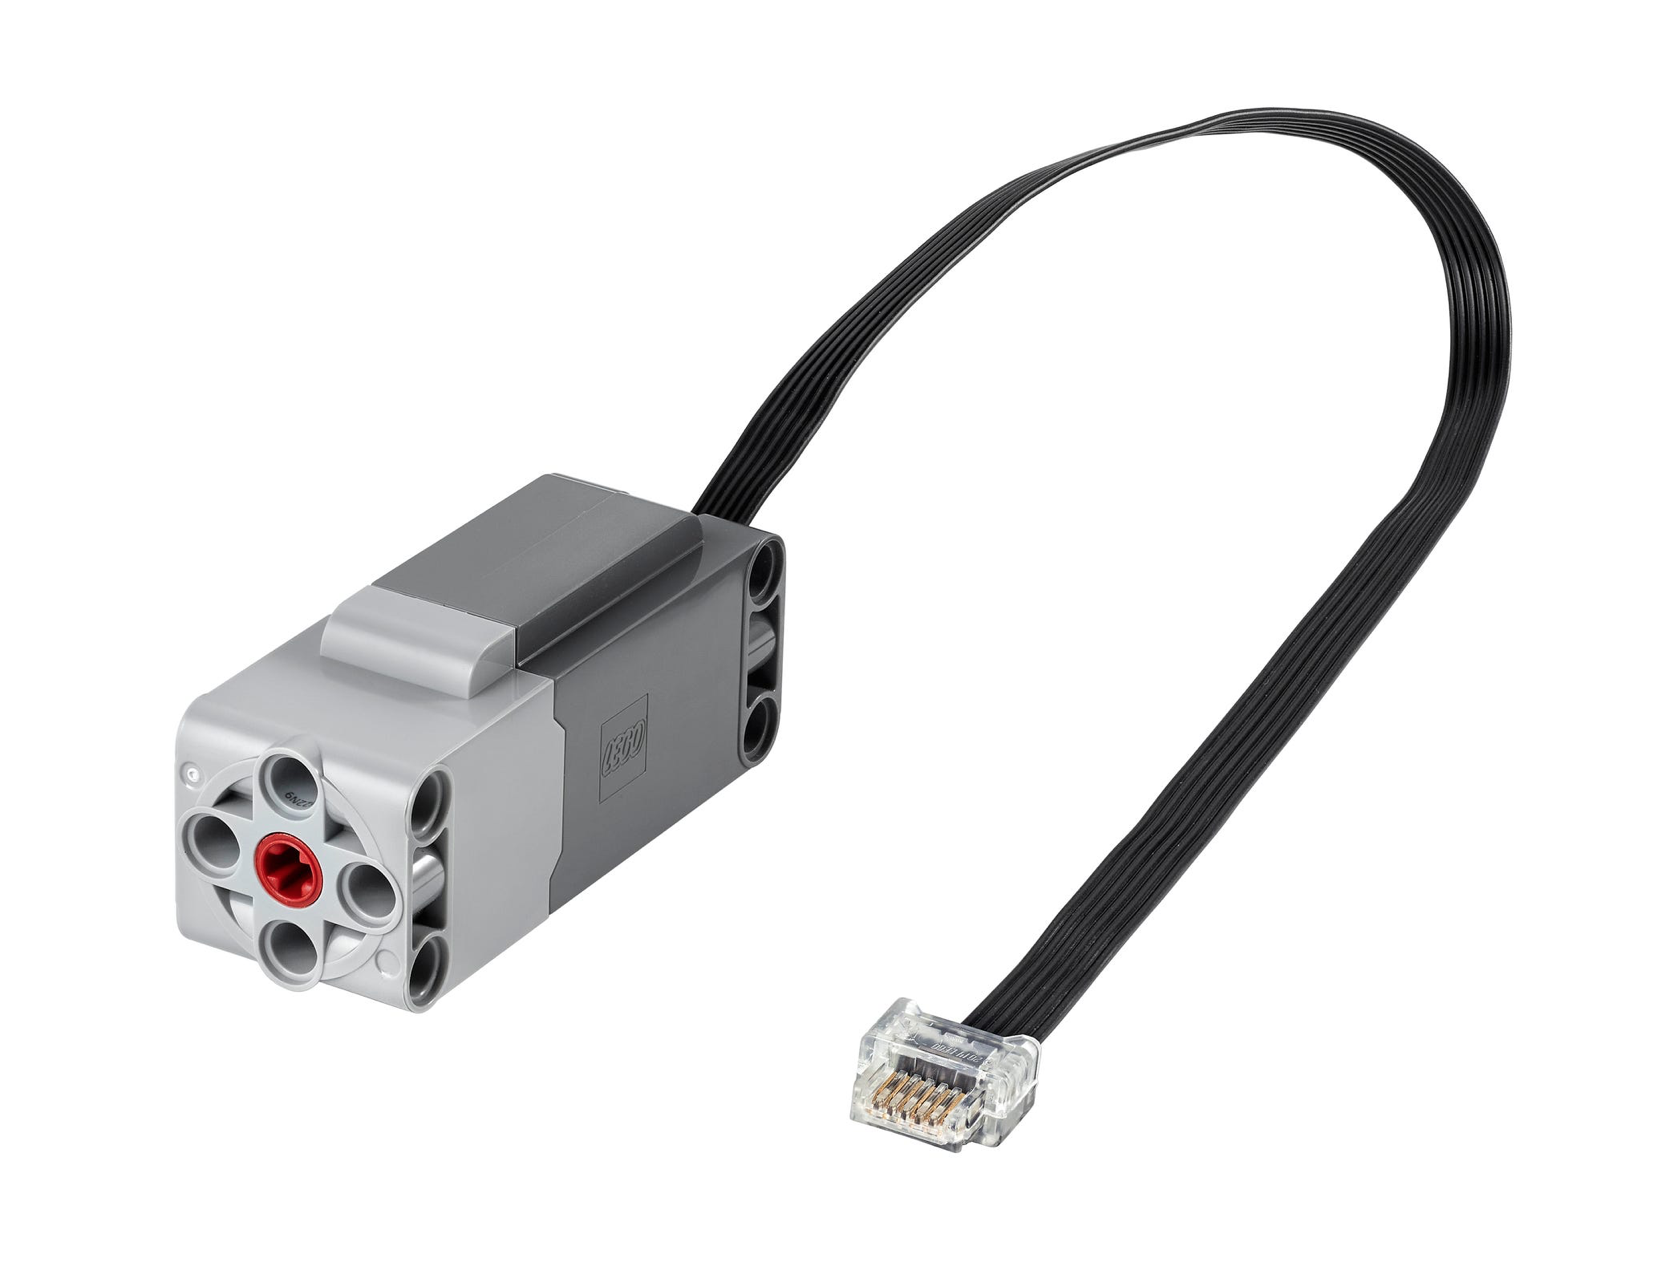
All of these speak the LEGO Wireless Protocol over Bluetooth with LEGO's own firmware, and node-poweredup supports every one of them. Motors such as the Technic Large Motor plug into the Technic Hub's ports A to D, which the protocol numbers 0 to 3.
Not compatible: the SPIKE Prime and MINDSTORMS Robot Inventor hub, also sold on its own as the Technic Large Hub, does not speak this protocol over Bluetooth with LEGO's firmware. The open-source Pybricks firmware lets you program it from Chrome or Edge instead. Their motors and sensors do work with the Technic Hub.
Initial Setup & Connection
Step 1: Feature Detection
Always check if Web Bluetooth is available before attempting to connect:
// Check if Web Bluetooth is supported
if (!navigator.bluetooth) {
  alert('Web Bluetooth is not supported in this browser. Try Chrome or Edge.');
  throw new Error('Web Bluetooth not supported');
}

console.log('Web Bluetooth is supported!');
Step 2: Request Bluetooth Device
Request access to LEGO hubs by filtering for the LEGO Wireless Protocol service UUID:
// LEGO Wireless Protocol service UUID
const LEGO_SERVICE_UUID = '00001623-1212-efde-1623-785feabcd123';

async function connectToLEGOHub() {
  try {
    console.log('Requesting LEGO hub...');

    // Request device with LEGO service filter
    const device = await navigator.bluetooth.requestDevice({
      filters: [{ services: [LEGO_SERVICE_UUID] }],
      optionalServices: [LEGO_SERVICE_UUID]
    });

    console.log('Device selected:', device.name);

    // Connect to GATT server
    const server = await device.gatt.connect();
    console.log('Connected to GATT server');

    // Get LEGO service
    const service = await server.getPrimaryService(LEGO_SERVICE_UUID);
    console.log('LEGO service found');

    // Get characteristic for communication
    const characteristic = await service.getCharacteristic(
      '00001624-1212-efde-1623-785feabcd123'  // LEGO characteristic UUID
    );

    console.log('Ready to communicate!');
    return { device, server, characteristic };

  } catch (error) {
    console.error('Connection failed:', error);
    throw error;
  }
}
Step 3: HTML Button to Trigger Connection
<!DOCTYPE html>
<html>
<head>
  <title>LEGO Web Bluetooth Controller</title>
</head>
<body>
  <h1>LEGO Hub Controller</h1>
  <button id="connectBtn">Connect to LEGO Hub</button>
  <div id="status">Not connected</div>

  <script>
    // Paste LEGO_SERVICE_UUID and connectToLEGOHub() from Step 2 here

    document.getElementById('connectBtn').addEventListener('click', async () => {
      const connection = await connectToLEGOHub();
      document.getElementById('status').textContent = 'Connected!';
    });
  </script>
</body>
</html>LEGO Wireless Protocol Basics
LEGO hubs use a binary protocol called the LEGO Wireless Protocol (LWP). Commands are sent as byte arrays:
Message Structure
// Basic message format:
// [Length, HubID, MessageType, ...Payload]

// Example: Turn on LED to blue
// (the LED port must already be in RGB mode; Example 4 shows the setup message)
const message = new Uint8Array([
  0x0A,  // Length (10 bytes)
  0x00,  // Hub ID
  0x81,  // Port Output Command
  0x32,  // Port 50 (RGB LED)
  0x11,  // Startup and completion: execute immediately, command feedback
  0x51,  // Sub-command: WriteDirectModeData
  0x01,  // Mode: Direct RGB
  0x00, 0x00, 0xFF  // RGB: Blue (R=0, G=0, B=255)
]);

// Send command to hub
await characteristic.writeValue(message);
Common Message Types
| Message Type | Hex | Purpose |
|---|---|---|
| Hub Properties | 0x01 | Get hub name, battery, etc. |
| Hub Actions | 0x02 | Shutdown, disconnect, etc. |
| Hub Attached I/O | 0x04 | Hub reports a device plugged into a port |
| Port Information Request | 0x21 | Query port capabilities |
| Port Input Format Setup | 0x41 | Choose a sensor mode and turn notifications on |
| Port Value | 0x45 | Receive sensor data |
| Virtual Port Setup | 0x61 | Pair two motor ports into one |
| Port Output Command | 0x81 | Control motors/LEDs |
Motor Control Examples
Example 1: Run a Motor at a Set Power
/**
 * Run a motor at specified speed
 * @param {BluetoothRemoteGATTCharacteristic} characteristic
 * @param {number} port - Motor port (0-5 for ports A-F)
 * @param {number} speed - Power (-100 to 100)
 */
async function runMotor(characteristic, port, speed) {
  // Clamp speed to valid range
  speed = Math.max(-100, Math.min(100, speed));

  // Convert to signed byte
  const speedByte = speed < 0 ? 256 + speed : speed;

  const message = new Uint8Array([
    0x08,  // Length
    0x00,  // Hub ID
    0x81,  // Port Output Command
    port,  // Port number (0=A, 1=B, etc.)
    0x11,  // Startup and completion: execute immediately, command feedback
    0x51,  // Sub-command: WriteDirectModeData
    0x00,  // Mode 0: StartPower
    speedByte  // Speed value
  ]);

  await characteristic.writeValue(message);
  console.log(`Motor on port ${port} running at ${speed}%`);
}

// Usage:
await runMotor(characteristic, 0, 50);   // Port A forward at 50%
await runMotor(characteristic, 1, -75);  // Port B backward at 75%
Mode 0 of WriteDirectModeData sets the motor's power, not a regulated speed, so the motor slows down under load. The StartSpeed subcommand (0x07) holds a speed instead, and Example 2 uses its sibling StartSpeedForDegrees.
Example 2: Run Motor for Degrees
/**
 * Run motor for specific number of degrees
 * @param {BluetoothRemoteGATTCharacteristic} characteristic
 * @param {number} port - Motor port
 * @param {number} degrees - Degrees to rotate
 * @param {number} speed - Speed (0-100)
 */
async function runMotorForDegrees(characteristic, port, degrees, speed = 50) {
  // Convert degrees to little-endian 32-bit integer
  const degreesBytes = new Uint8Array(4);
  new DataView(degreesBytes.buffer).setInt32(0, degrees, true);

  const message = new Uint8Array([
    0x0E,  // Length
    0x00,  // Hub ID
    0x81,  // Port Output Command
    port,
    0x11,  // Startup and completion: execute immediately, command feedback
    0x0B,  // Sub-command: StartSpeedForDegrees
    ...degreesBytes,  // Degrees (4 bytes, little-endian)
    speed,  // Speed
    0x64,   // Max power (100%)
    0x7E,   // End state: Hold
    0x00    // Use profile: none
  ]);

  await characteristic.writeValue(message);
  console.log(`Motor ${port} rotating ${degrees} degrees`);
}

// Usage:
await runMotorForDegrees(characteristic, 0, 360, 75);  // 1 full rotation
Example 3: Stop Motor
async function stopMotor(characteristic, port) {
  const message = new Uint8Array([
    0x08,  // Length
    0x00,  // Hub ID
    0x81,  // Port Output Command
    port,
    0x11,  // Startup and completion: execute immediately, command feedback
    0x51,  // Sub-command: WriteDirectModeData
    0x00,  // Mode 0: StartPower
    0x00   // Power: 0 (stop and float; 0x7F brakes instead)
  ]);

  await characteristic.writeValue(message);
  console.log(`Motor ${port} stopped`);
}
Example 4: Set Hub LED Color
/**
 * Set the hub's RGB LED color
 * @param {number} r - Red (0-255)
 * @param {number} g - Green (0-255)
 * @param {number} b - Blue (0-255)
 */
async function setHubLED(characteristic, r, g, b) {
  // Put the LED port in RGB mode (mode 1) so it accepts RGB values
  const setupMessage = new Uint8Array([
    0x0A,  // Length
    0x00,  // Hub ID
    0x41,  // Port Input Format Setup (Single)
    0x32,  // Port 50 (RGB LED on hub)
    0x01,  // Mode: Direct RGB
    0x01, 0x00, 0x00, 0x00,  // Delta interval (1)
    0x00   // Notifications disabled
  ]);

  await characteristic.writeValue(setupMessage);

  const message = new Uint8Array([
    0x0A,  // Length
    0x00,  // Hub ID
    0x81,  // Port Output Command
    0x32,  // Port 50 (RGB LED on hub)
    0x11,  // Startup and completion: execute immediately, command feedback
    0x51,  // Sub-command: WriteDirectModeData
    0x01,  // Mode: Direct RGB
    r, g, b  // RGB values
  ]);

  await characteristic.writeValue(message);
}

// Usage:
await setHubLED(characteristic, 255, 0, 0);    // Red
await setHubLED(characteristic, 0, 255, 0);    // Green
await setHubLED(characteristic, 0, 0, 255);    // Blue
await setHubLED(characteristic, 255, 255, 0);  // Yellow
Reading Sensor Data
Example 5: Subscribe to Port Value Updates
/**
 * Enable notifications from a sensor port
 * @param {BluetoothRemoteGATTCharacteristic} characteristic
 * @param {number} port - Sensor port
 * @param {number} mode - Sensor mode (0 = color on the Color Sensor, 0 = distance on the Distance Sensor)
 */
async function subscribeSensor(characteristic, port, mode = 0) {
  // Enable notifications
  await characteristic.startNotifications();

  // Listen for port value updates
  characteristic.addEventListener('characteristicvaluechanged', (event) => {
    const value = event.target.value;
    const bytes = new Uint8Array(value.buffer);

    // Check if this is a port value message (0x45)
    if (bytes[2] === 0x45 && bytes[3] === port) {
      // Parse sensor value (depends on sensor type): a 6-byte message carries
      // a 16-bit little-endian value (distance), a 5-byte message one byte (color)
      const sensorValue = bytes[0] === 6 ? value.getUint16(4, true) : bytes[4];
      console.log(`Port ${port} value:`, sensorValue);

      // Trigger custom event with sensor data
      document.dispatchEvent(new CustomEvent('sensorData', {
        detail: { port, value: sensorValue }
      }));
    }
  });

  // Send port input format setup
  const message = new Uint8Array([
    0x0A,  // Length
    0x00,  // Hub ID
    0x41,  // Port Input Format Setup (Single)
    port,
    mode,  // Mode
    0x01, 0x00, 0x00, 0x00,  // Delta interval (1)
    0x01   // Notification enabled
  ]);

  await characteristic.writeValue(message);
  console.log(`Subscribed to port ${port} in mode ${mode}`);
}

// Usage: Subscribe to color sensor on port 2
await subscribeSensor(characteristic, 2, 0);

// Listen for sensor updates
document.addEventListener('sensorData', (e) => {
  console.log(`Sensor on port ${e.detail.port}: ${e.detail.value}`);
});
Example 6: Reading Distance Sensor
// Subscribe to distance sensor (port 3, mode 0 = distance in mm)
await subscribeSensor(characteristic, 3, 0);

document.addEventListener('sensorData', (e) => {
  if (e.detail.port === 3) {
    const distanceCm = e.detail.value / 10;  // Sensor reports millimetres
    document.getElementById('distance').textContent = `${distanceCm} cm`;

    // React to proximity
    if (distanceCm < 10) {
      console.log('Object detected close by!');
    }
  }
});
Building a Complete Control Interface
This page puts the examples together: a power slider and stop button for the motor on port A, LED color buttons and a live reading from a distance sensor on port D. It is self-contained, so save it as an HTML file and open it from localhost or an HTTPS address. One detail matters more than it looks: Web Bluetooth runs one operation at a time, and a slider sends a burst of events, so every write goes through a small queue instead of being fired off at once.
<!DOCTYPE html>
<html>
<head>
  <title>LEGO Hub Controller</title>
  <style>
    body { font-family: Arial, sans-serif; max-width: 600px; margin: 50px auto; }
    button { padding: 10px 20px; margin: 5px; font-size: 16px; }
    .motor-control { margin: 20px 0; padding: 20px; border: 1px solid #ccc; }
    input[type=range] { width: 100%; }
    #status { padding: 10px; background: #f0f0f0; border-radius: 5px; }
  </style>
</head>
<body>
  <h1>LEGO Web Bluetooth Controller</h1>

  <button id="connectBtn">Connect to Hub</button>
  <div id="status">Not connected</div>

  <div class="motor-control" id="controls" style="display:none;">
    <h2>Motor A Control</h2>
    <label>Power: <span id="speedValue">0</span>%</label>
    <input type="range" id="speedSlider" min="-100" max="100" value="0">
    <button id="stopBtn">Stop Motor</button>

    <h2>Hub LED</h2>
    <button data-rgb="255,0,0">Red</button>
    <button data-rgb="0,255,0">Green</button>
    <button data-rgb="0,0,255">Blue</button>
    <button data-rgb="0,0,0">Off</button>

    <h2>Distance Sensor</h2>
    <div>Distance: <span id="distance">--</span> cm</div>
  </div>

  <script>
    const LEGO_SERVICE = '00001623-1212-efde-1623-785feabcd123';
    const LEGO_CHARACTERISTIC = '00001624-1212-efde-1623-785feabcd123';
    let characteristic = null;

    // Web Bluetooth runs one GATT operation at a time, and the slider fires
    // many input events, so every write waits for the one before it.
    let queue = Promise.resolve();
    function send(task) {
      queue = queue.then(task).catch((error) => console.error(error));
      return queue;
    }

    function write(bytes) {
      return characteristic.writeValue(new Uint8Array(bytes));
    }

    // Port Output Command, WriteDirectModeData, mode 0: power -100 to 100
    function runMotor(port, power) {
      power = Math.max(-100, Math.min(100, power));
      return write([0x08, 0x00, 0x81, port, 0x11, 0x51, 0x00, power & 0xFF]);
    }

    function stopMotor(port) {
      return write([0x08, 0x00, 0x81, port, 0x11, 0x51, 0x00, 0x00]);
    }

    // Put the hub LED (port 50) in RGB mode, then set its color
    async function setHubLED(r, g, b) {
      await write([0x0A, 0x00, 0x41, 0x32, 0x01, 0x01, 0x00, 0x00, 0x00, 0x00]);
      await write([0x0A, 0x00, 0x81, 0x32, 0x11, 0x51, 0x01, r, g, b]);
    }

    // Port Input Format Setup with notifications on
    function subscribeSensor(port, mode) {
      return write([0x0A, 0x00, 0x41, port, mode, 0x01, 0x00, 0x00, 0x00, 0x01]);
    }

    function onNotification(event) {
      const value = event.target.value;
      // Port Value (0x45) from port 3, 6 bytes long: a 16-bit distance in mm
      if (value.getUint8(2) === 0x45 && value.getUint8(3) === 3 && value.getUint8(0) === 6) {
        document.getElementById('distance').textContent = value.getUint16(4, true) / 10;
      }
    }

    document.getElementById('connectBtn').addEventListener('click', async () => {
      try {
        const device = await navigator.bluetooth.requestDevice({
          filters: [{ services: [LEGO_SERVICE] }]
        });
        const server = await device.gatt.connect();
        const service = await server.getPrimaryService(LEGO_SERVICE);
        characteristic = await service.getCharacteristic(LEGO_CHARACTERISTIC);

        characteristic.addEventListener('characteristicvaluechanged', onNotification);
        await characteristic.startNotifications();
        await send(() => subscribeSensor(3, 0));  // distance sensor on port D

        document.getElementById('status').textContent = 'Connected to ' + device.name;
        document.getElementById('controls').style.display = 'block';
      } catch (error) {
        document.getElementById('status').textContent = 'Connection failed: ' + error.message;
      }
    });

    document.getElementById('speedSlider').addEventListener('input', (e) => {
      const power = parseInt(e.target.value, 10);
      document.getElementById('speedValue').textContent = power;
      if (characteristic) send(() => runMotor(0, power));  // port A
    });

    document.getElementById('stopBtn').addEventListener('click', () => {
      if (!characteristic) return;
      send(() => stopMotor(0));
      document.getElementById('speedSlider').value = 0;
      document.getElementById('speedValue').textContent = 0;
    });

    document.querySelectorAll('[data-rgb]').forEach((button) => {
      button.addEventListener('click', () => {
        const [r, g, b] = button.dataset.rgb.split(',').map(Number);
        if (characteristic) send(() => setHubLED(r, g, b));
      });
    });
  </script>
</body>
</html>
Using node-poweredup Library (Easier Approach)
To skip the byte-level work, use node-poweredup, an open-source library that wraps the protocol. It runs in Node.js and, through its browser build, on a web page:
<!-- Include the library's browser build, pinned to one version -->
<script src="https://cdn.jsdelivr.net/npm/node-poweredup@10.1.0/dist/browser/poweredup.js"></script>

<button id="connectBtn">Connect to Hub</button>

<script>
  const poweredUP = new PoweredUP.PoweredUP();

  // Runs once a hub has been picked in the browser's device chooser
  poweredUP.on('discover', async (hub) => {
    await hub.connect();
    console.log('Connected to', hub.name);

    const motor = await hub.waitForDeviceAtPort('A');
    motor.setPower(50);  // port A at 50% power
  });

  // Scanning opens the device chooser, so it must start from a click
  document.getElementById('connectBtn').addEventListener('click', () => {
    poweredUP.scan();
  });
</script>
Why use node-poweredup:
- ✅ Encodes and decodes the protocol messages for you
- ✅ Written in TypeScript, with type definitions
- ✅ Supports the Technic Hub, Powered Up Hub, BOOST Move Hub, SPIKE Essential hub, DUPLO Train Base and more (not SPIKE Prime)
- ✅ Parses sensor readings into named events
GitHub: nathankellenicki/node-poweredup
Troubleshooting Common Issues
"Bluetooth not supported" Error
- ✓ Use Chrome, Edge or Opera (Safari and Firefox do not support Web Bluetooth)
- ✓ Serve the page over HTTPS or from
localhost: Web Bluetooth only works in a secure context - ✓ On Linux, turn on
chrome://flags/#enable-experimental-web-platform-features
Hub Not Appearing in Device List
- ✓ Turn the hub off and on again: it only appears in the chooser while it is waiting for a connection
- ✓ Make sure hub is not connected to another device
- ✓ Check the hub's batteries
- ✓ Ensure Bluetooth is enabled on your computer
Commands Not Working
- ✓ Verify correct port numbers (0=A, 1=B, 2=C, etc.)
- ✓ Check message length byte is correct
- ✓ Ensure motor/sensor is actually connected to that port
- ✓ Use the browser DevTools console to see error messages; "GATT operation already in progress" means two writes overlapped, so queue them as the control page does
Connection Drops Frequently
- ✓ Move the computer closer to the hub
- ✓ Remove obstacles between devices
- ✓ Avoid interference from other Bluetooth devices
- ✓ Update the hub's firmware with the LEGO Powered Up app
Advanced Topics
Multi-Hub Control
Each hub is its own connection, so keep one characteristic per hub. Because the device chooser only opens from a click, connect each hub from its own click:
// requestDevice() needs a fresh click every time, so each hub gets its own click
// (an "Add hub" button and a "Run all" button on the page)
const hubs = [];

document.getElementById('addHubBtn').addEventListener('click', async () => {
  hubs.push(await connectToLEGOHub());
});

document.getElementById('runAllBtn').addEventListener('click', async () => {
  for (const hub of hubs) {
    await runMotor(hub.characteristic, 0, 50);  // port A on every hub
  }
});
Synchronized Motor Control
To drive two motors as one, for example the wheels of a robot, ask the hub to combine their ports into a virtual port:
// Virtual Port Setup (0x61): pair ports A (0) and B (1) into one virtual port
const pairAB = new Uint8Array([0x06, 0x00, 0x61, 0x01, 0x00, 0x01]);
await characteristic.writeValue(pairAB);

// The hub answers with a Hub Attached I/O message (0x04, event 0x02) that
// carries the new virtual port's ID. Port Output Commands (0x81) sent to
// that ID drive both motors together.

// To split the pair again: Virtual Port Setup with 0x00 and the virtual port ID
// await characteristic.writeValue(new Uint8Array([0x05, 0x00, 0x61, 0x00, virtualPortId]));
Learning Resources
- Official LEGO Wireless Protocol Documentation
- node-poweredup Library (GitHub)
- LWP JavaScript Library
- Chrome Developers: LEGO Education + Web Bluetooth
Project Ideas
- Virtual Joystick: Use HTML5 canvas to create on-screen joystick for robot control
- Sensor Dashboard: Real-time graphs of distance/color sensor data with Chart.js
- Voice Control: Combine Web Speech API with Web Bluetooth for voice-controlled robots
- Multiplayer Game: WebSocket server coordinates multiple players controlling different hubs
- Educational IDE: Block-based programming interface that generates Web Bluetooth code
- AR Control: Use WebXR + Web Bluetooth to control physical robot with AR interface
Related Guides
- Programming a SPIKE Prime or Robot Inventor hub instead? See How to Program LEGO MINDSTORMS Robot Inventor with Python and Pybricks vs LEGO Firmware.
- Want a microcontroller in the loop? ESP32 + LEGO Powered Up drives the same hubs from an ESP32.
Use Our Tools to Go Further
Get more insights about the sets mentioned in this article with our free LEGO tools