Raspberry Pi Build HAT: Python Guide to LEGO Motors
Supporting Free Content
When you purchase through our links, we earn a small commission at no extra cost to you. As an eBay Partner, this helps us keep bringing you expert LEGO® reviews and guides. Thank you for your support!
The Raspberry Pi Build HAT drives LEGO Technic and SPIKE motors and reads SPIKE sensors from Python. This guide covers what it works with, the power it needs, the serial setup people miss, and working code for motors, motor pairs and sensors.
The Raspberry Pi Build HAT lets a Raspberry Pi drive LEGO motors and read LEGO sensors from Python.
It plugs onto the Pi's 40-pin header, has four ports for SPIKE Prime, Robot Inventor and Technic devices, and comes
with a Python library, buildhat, that turns a motor or a sensor into one line of code. This guide covers
what it works with, the power it needs, the serial setting most first attempts miss, and working code for motors,
motor pairs and every SPIKE sensor.
python3-build-hat, enable the serial port hardware and disable the
serial console in raspi-config, power the board from an 8V supply rated 48 W, then
Motor('A').run_for_seconds(5) should turn the motor on port A. Motors and the colour and distance sensors
do not run on the Pi's USB power alone.
What the Build HAT is
The Build HAT is a Raspberry Pi add-on board made by Raspberry Pi in partnership with LEGO Education. Raspberry Pi says it fits every Raspberry Pi computer with a 40-pin GPIO header, including the Zero series, and that it will remain in production until at least January 2028. A small microcontroller on the board talks to the LEGO devices; the Pi talks to that microcontroller over its serial port, which is why the serial setting below matters.
Buy one from a Raspberry Pi reseller or the Raspberry Pi Build HAT on Amazon, with the Build HAT power supply if you plan to run motors.
What it works with
Raspberry Pi lists the devices from the LEGO Education SPIKE portfolio and the MINDSTORMS Robot Inventor kit:
- Motors: the large, medium and small angular motors, and the Technic large, XL and linear motors that use the same connector.
- Sensors: the colour sensor, the distance sensor, the force sensor and the 3x3 colour light matrix.
Older Power Functions motors use a different plug and do not connect. LEGO Education stopped selling SPIKE Prime on June 30, 2026, and our catalog lists the separate SPIKE motors and sensors as retired, so new SPIKE parts are now remaining stock or second hand. The Technic Large Motor uses the same connector:
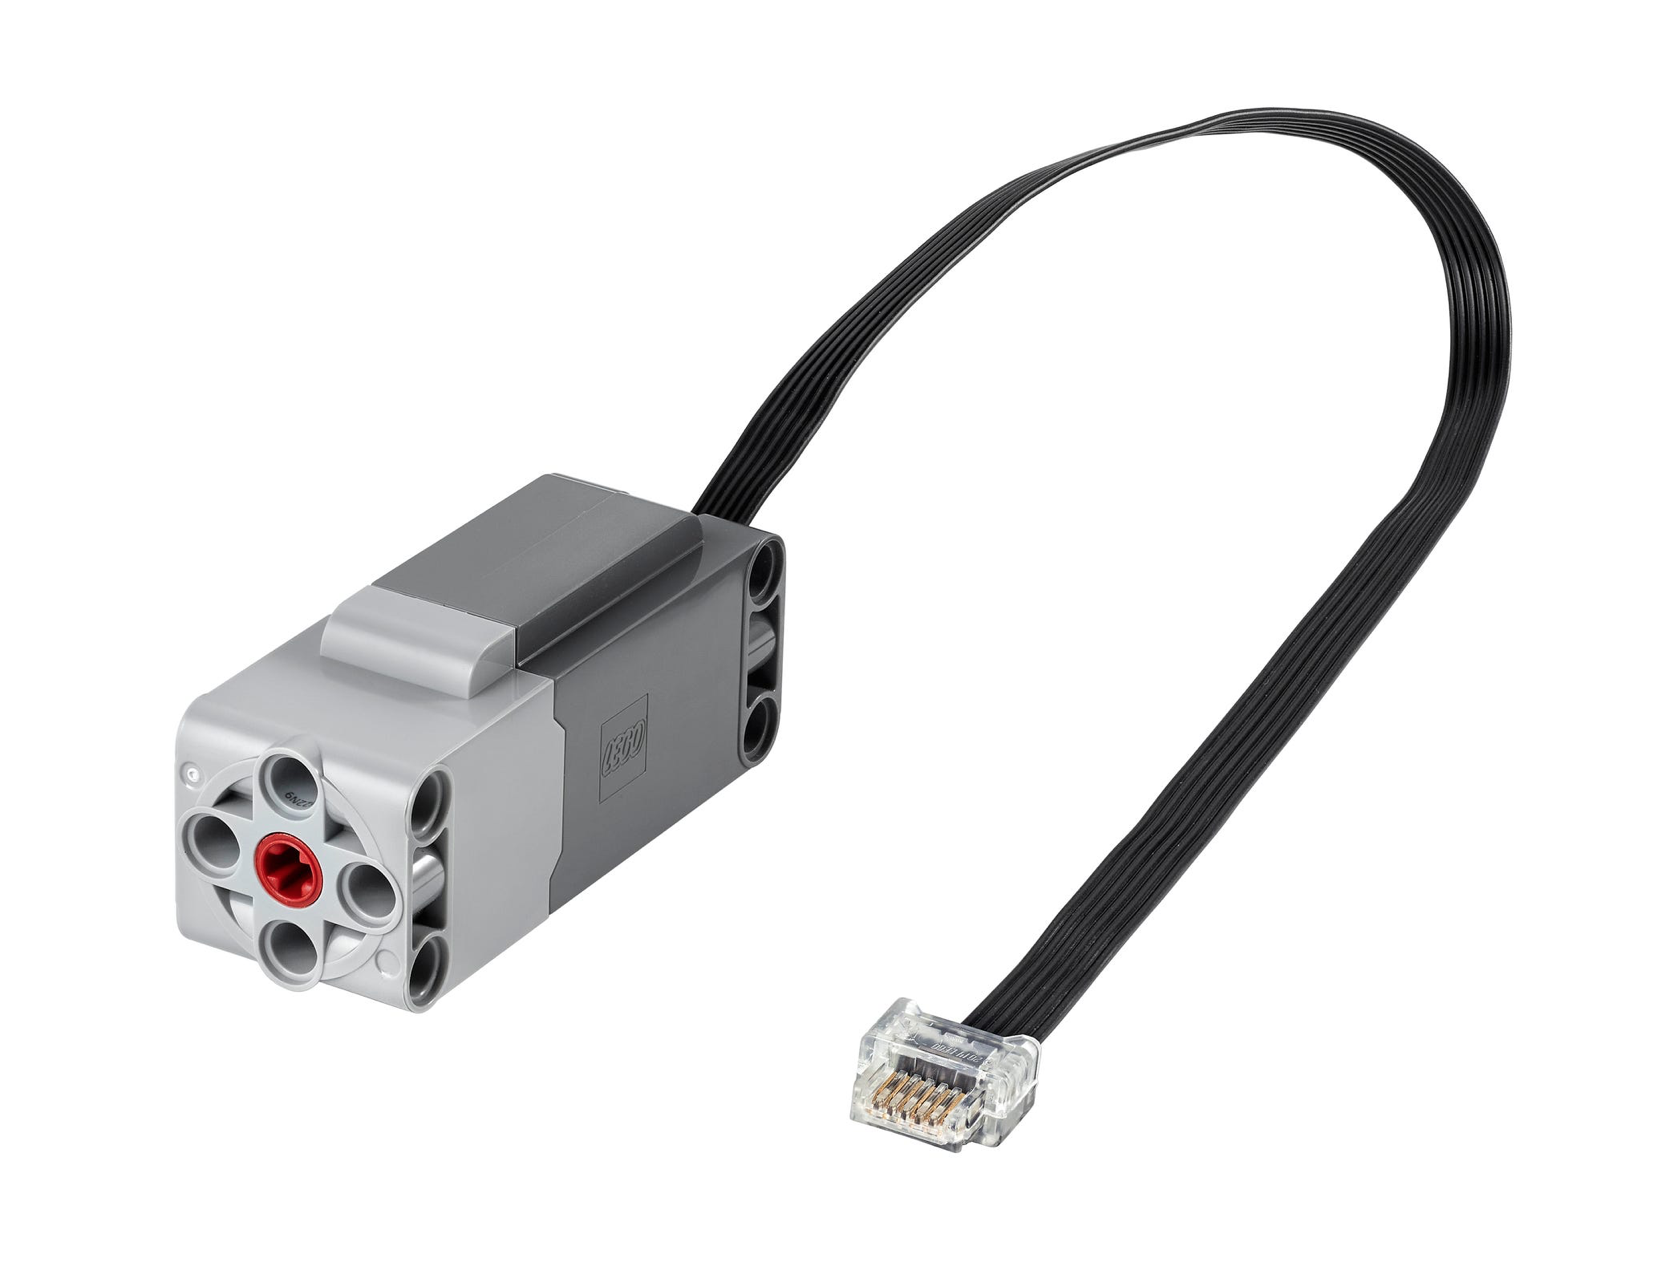
The Technic Large Motor, which plugs straight into a Build HAT port and reports its position, so run_to_position and get_position work with it.
If you already own a SPIKE Prime set or a MINDSTORMS Robot Inventor set, every motor and sensor in it works with the Build HAT.
Power: the part most guides get wrong
The LEGO motors need more than a Raspberry Pi's USB supply can give. Raspberry Pi specifies an external supply of 8V plus or minus 10 percent, rated 48 W, with a 5.5 mm by 2.1 mm centre-positive barrel plug, and sells a matching Build HAT power supply. Plugged into the Build HAT, it powers the board, the LEGO devices and the Pi itself, so you do not need a second USB supply. The exception is a keyboard-series Pi such as the Raspberry Pi 400, which connects through a ribbon cable and needs its own USB supply.
Without the external supply, the Build HAT can still read motor encoders and the force sensor, but motors will not turn and the colour and distance sensors, like the motors, need the external supply too.
Setup
1. Fit the board
With the Pi powered off, press the Build HAT onto the 40-pin header. Connect the barrel supply to the Build HAT, not to the Pi.
2. Install the library
On Raspberry Pi OS, the library is in the official repositories:
sudo apt update
sudo apt install python3-build-hat
3. Enable the serial port
This is the step that most often goes missing. Run sudo raspi-config, open Interface Options,
then Serial Port. Answer No to a login shell over serial and Yes to
enabling the serial port hardware, then reboot.
4. Check it works
This is the test from Raspberry Pi's own documentation. With a motor on port A:
from buildhat import Motor

motor_a = Motor('A')
motor_a.run_for_seconds(5)
The first program after each boot pauses for a few seconds while the firmware is copied to the board. When the red LED goes out and the green LED lights, the board is ready. If you get an error about the serial port, recheck step 3.
Driving motors
Speeds run from -100 to 100. Positions come in two kinds: get_position() counts degrees from where the
motor started and can go past a full turn, while run_to_position() and get_aposition() use the
motor's absolute angle, from -180 to 180.
from buildhat import Motor

motor = Motor('A')

motor.run_for_seconds(2, speed=50)
motor.run_for_rotations(3, speed=75)
motor.run_for_degrees(90, speed=30)

motor.run_to_position(180, speed=50)
print(motor.get_aposition())

print(motor.get_position())
start(speed) runs a motor until you call stop(), and set_default_speed() sets the
speed every later call uses when you leave it out:
from buildhat import Motor
import time

motor = Motor('A')
motor.set_default_speed(30)

for angle in [0, 90, 180, -90, 0]:
    motor.run_to_position(angle)
    time.sleep(0.5)

motor.start(40)
time.sleep(2)
motor.stop()
Asking run_to_position() for an angle outside -180 to 180, such as 270 or 360, raises a
MotorError; use run_for_degrees() to turn further.
Two motors as a drive base
MotorPair drives two ports together, with a speed for each side. On most two-motor chassis the motors
face opposite ways, so driving straight needs one positive and one negative speed; flip the signs if your robot
spins instead.
from buildhat import MotorPair

pair = MotorPair('A', 'B')

pair.run_for_seconds(2, speedl=50, speedr=-50)
pair.run_for_seconds(1, speedl=50, speedr=50)
pair.stop()
Reading sensors
Colour sensor
from buildhat import ColorSensor

sensor = ColorSensor('C')

print(sensor.get_color())
r, g, b, i = sensor.get_color_rgbi()
print(r, g, b, i)
print(sensor.get_reflected_light())
print(sensor.get_ambient_light())
get_color() returns a colour name, and wait_until_color('red') blocks until it sees one.
Distance sensor
Distances come back in millimetres, and the library returns -1 when nothing is in range, so check for it:
from buildhat import DistanceSensor
import time

sensor = DistanceSensor('D')

while True:
    d = sensor.get_distance()
    if 0 <= d < 100:
        print('Something within 10 cm')
    time.sleep(0.1)
Force sensor
from buildhat import ForceSensor

sensor = ForceSensor('B')

print(sensor.get_force())
sensor.wait_until_pressed()
print('Pressed')
sensor.wait_until_released()
print('Released')
get_force() returns the force in newtons, and is_pressed() returns True or False.
Logging a run to a file
Because it is ordinary Python, the Build HAT fits into anything else the Pi can do. This logs a motor's position and the colour under a sensor to a CSV file you can open in a spreadsheet:
from buildhat import Motor, ColorSensor
import csv
import time

motor = Motor('A')
sensor = ColorSensor('C')

with open('run.csv', 'w', newline='') as f:
    writer = csv.writer(f)
    writer.writerow(['time', 'position', 'colour', 'reflected'])
    motor.start(30)
    for _ in range(100):
        writer.writerow([time.time(), motor.get_position(), sensor.get_color(), sensor.get_reflected_light()])
        time.sleep(0.1)
    motor.stop()
Project ideas
- A colour sorter: a camera or the colour sensor picks a bin and a motor turns a chute. Our AI LEGO sorting machine guide covers the camera side.
-
A robot arm: two or three angular motors with
run_to_position()give repeatable poses. -
A drive base:
MotorPairplus the distance sensor makes a robot that stops before a wall. - A logger: the CSV example above, run on a timer, records how a mechanism behaves over time.
Build HAT or a LEGO hub?
The Build HAT gives you a full Linux computer, a camera, the network and any Python library, at the cost of a separate power supply and a bigger, wired build. A LEGO hub runs on batteries and fits inside a model. If you want Python on a LEGO hub itself, see Pybricks vs LEGO firmware, and for how the connector itself works, our LPF2 connector guide.
Use Our Tools to Go Further
Get more insights about the sets mentioned in this article with our free LEGO tools