LEGO Forced Perspective: Creating Depth and Scale Illusions
Supporting Free Content
When you purchase through our links, we earn a small commission at no extra cost to you. As an Amazon Associate and eBay Partner, this helps us keep bringing you expert LEGO® reviews and guides. Thank you for your support!
Create stunning depth and scale illusions in your LEGO MOCs using forced perspective building techniques.
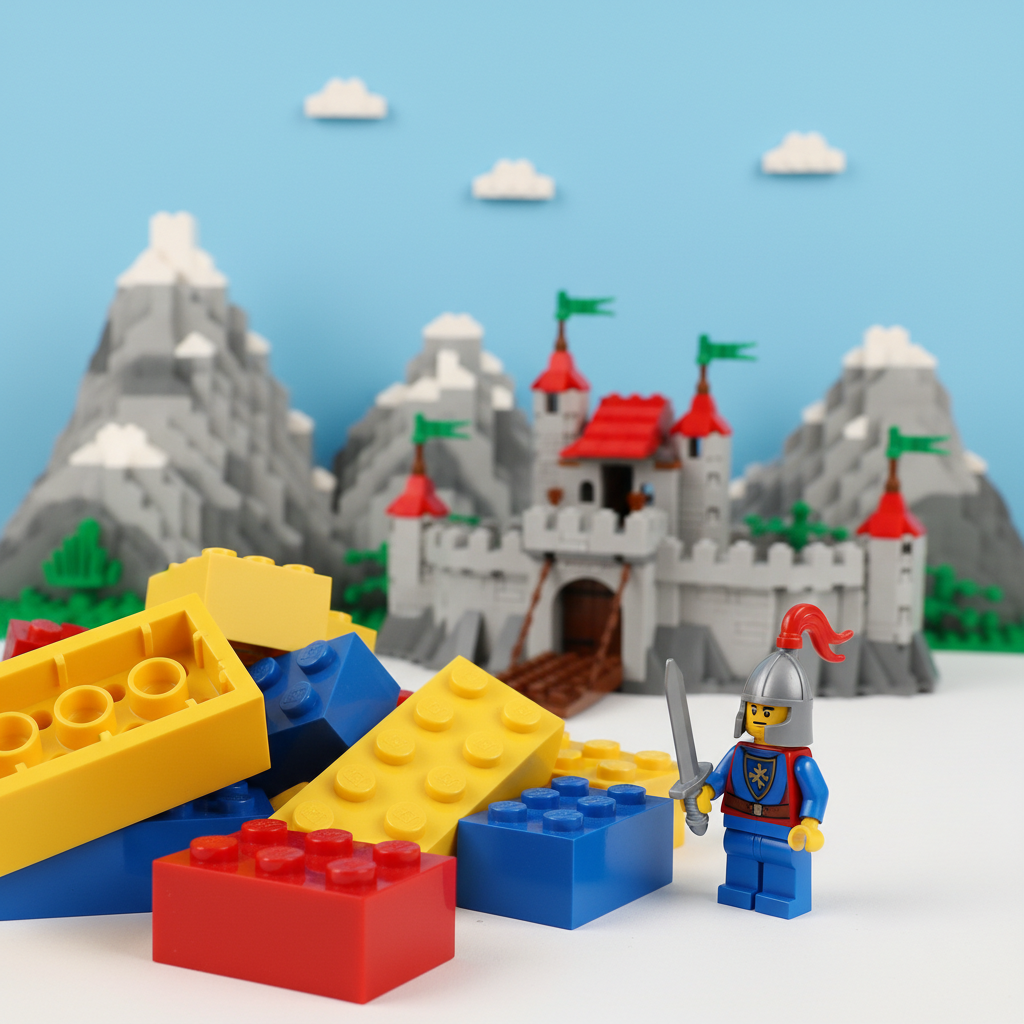
LEGO forced perspective is a masterful building technique that manipulates visual perception, creating the illusion of greater depth, distance, or scale within a brick-built scene than physically exists. By strategically arranging LEGO elements, builders can make objects appear closer or farther, larger or smaller, adding incredible realism and dramatic impact to their MOCs (My Own Creations) and dioramas without requiring immense physical space or an impossible number of bricks. This guide will delve into the magic of this technique, offering insights, tips, and product recommendations to help you craft your own stunning optical illusions.
What is LEGO Forced Perspective? The Art of Visual Deception
At its heart, forced perspective is an optical illusion that tricks the eye into perceiving objects, distances, or sizes differently from their actual physical properties. It's a technique long employed in photography, filmmaking, and traditional art, and it translates beautifully into the world of LEGO building. Imagine a towering mountain range receding into the distance, a colossal creature looming over a tiny village, or an endless road stretching to the horizon – all compressed into a relatively small LEGO display.
In LEGO, this illusion is achieved by carefully manipulating the scale, detail, color, and placement of bricks. Larger, more detailed elements are typically placed in the foreground, gradually transitioning to smaller, less detailed, and often lighter-colored elements in the background. When viewed from a specific "sweet spot" (the intended viewing angle), the separate elements blend seamlessly, creating a cohesive scene with a profound sense of depth and scale.
Key Takeaways: Understanding the Illusion
- Definition: A visual trick to make objects appear larger/smaller or closer/farther than they are.
- Purpose: Adds realism, drama, and depth to LEGO builds, saving space and resources.
- Method: Achieved through careful manipulation of scale, detail, color, and positioning.
- Critical Element: Requires a specific viewing angle for the illusion to work effectively.
Why Master Forced Perspective in Your LEGO MOCs?
The allure of forced perspective isn't just about showing off a clever trick; it offers numerous practical and artistic benefits for LEGO builders:
- Enhanced Realism: It allows you to create landscapes, cityscapes, and epic scenes that feel truly vast and immersive, even if they're only a few feet deep. This realism draws viewers in and makes your builds more captivating.
- Dramatic Storytelling: By playing with scale, you can emphasize certain elements, highlight a sense of grandeur or isolation, and evoke powerful emotions. A tiny minifigure facing a seemingly gargantuan obstacle becomes instantly more dramatic.
- Space Efficiency: Building an entire city at minifigure scale would require an enormous amount of space and bricks. Forced perspective lets you convey that same sense of scale in a much smaller footprint, making ambitious projects more feasible for home builders.
- Resource Management: Fewer bricks are needed for the background elements, which can be simpler and smaller. This makes large-scale dioramas more accessible and cost-effective.
- Creative Challenge: It pushes your building skills, requiring careful planning, an understanding of visual perception, and innovative part usage. It's a rewarding technique to master.
- Photography Potential: Forced perspective MOCs are incredibly photogenic, often appearing even more impressive in photos where the viewing angle can be perfectly controlled.
Core Techniques for Creating LEGO Depth and Scale Illusions
Mastering forced perspective involves several interconnected techniques. Combining these elements thoughtfully is key to a successful illusion.
1. Varying Scale: The Foundation of Forced Perspective
This is arguably the most critical technique. You'll move from a larger scale in the foreground to progressively smaller scales as you recede into the background.
- Foreground (Minifigure Scale or Larger): This is where your most detailed elements and main subjects reside. If you're building a scene with characters, they'll be at standard minifigure scale. You might even use larger, "macro-scale" elements like a giant statue or creature to make everything else seem tiny. Consider using a LEGO Set 3723 (Lego Minifigure) or LEGO Set 3724 (Lego Dragon) as a large-scale focal point to truly play with the perception of size.
- Midground (Smaller Scale): Elements here might be slightly smaller than minifigure scale, or simplified versions of minifigure-scale objects. Buildings might be narrower, trees shorter.
- Background (Microscale/Nano-scale): Distant objects should be built at a significantly smaller scale. What might be a minifigure-scale tree in the foreground could be a tiny 1x1 cone or a stack of plates in the far background. Entire cities can be represented with just a few small bricks and plates.

Celebrate the 25th anniversary of the LEGO Minifigure with this iconic 2000 set. A must-have for serious LEGO collectors and sculpture enthusiasts.
2. Color and Detail Progression
Our eyes perceive objects that are closer as having more vibrant colors and intricate details, while distant objects appear desaturated and less defined. Replicate this effect in your LEGO builds:
- Foreground: Use rich, saturated colors and incorporate a high level of detail. Intricate greebling, unique parts, and varied textures will make these elements pop.
- Midground: Colors can become slightly less vibrant, and details can be simplified.
- Background: Opt for muted, desaturated, and lighter colors (e.g., light blue, light grey, tan). Details should be minimal, often relying on simple shapes and silhouettes. This "atmospheric perspective" helps create the illusion of haze and distance.
3. Strategic Angling and Vanishing Points
The way you angle your structures and terrain can dramatically enhance the illusion of depth:
- Converging Lines: Just like roads or railway tracks appear to converge in the distance, you can build structures that narrow and angle inwards as they recede. This creates a powerful vanishing point effect.
- Diagonal Placement: Rather than building everything parallel to the viewer, placing elements on a diagonal can make a scene feel deeper and more dynamic.
- Height Variation: Gradually decreasing the height of buildings or terrain features as they move away from the viewer reinforces the sense of distance.
4. Layering and Overlap
Overlapping elements is a natural way to create depth. When one object partially obscures another, our brain interprets the obscuring object as being closer.
- Foreground Layers: Place prominent features that slightly overlap the midground elements.
- Background Layers: Use simple, silhouetted forms that are partially hidden by the midground, further pushing them into the distance.
5. The Critical Viewing Angle and Photography
Forced perspective is highly dependent on the viewer's position. The illusion often breaks down if viewed from the wrong angle. This makes photography a crucial aspect of presenting your forced perspective MOCs.
- Find the "Sweet Spot": Experiment with different camera angles until the illusion is perfect. This is the angle from which your MOC is intended to be seen.
- Fixed Perspective: Many successful forced perspective builds are designed to be viewed from only one specific angle, often a low, eye-level perspective, similar to how we perceive real-world scenes.
- Lighting: Thoughtful lighting can enhance the illusion. Soft, diffused light can help blend transitions, while strategic shadows can add depth.
Essential Bricks and Sets for Your Forced Perspective Journey
To embark on your forced perspective building adventure, you'll need a good supply of versatile bricks. Here are some recommendations from Brick by Brick to get you started:
Foundation Sets: Bulk Bricks for Grand Visions
Forced perspective relies on having a variety of basic bricks, plates, and slopes in different sizes and colors. Large universal building sets are invaluable for this.
- Bonus Lego Basic Town: With a generous 2542 pieces, this set is a fantastic starting point. It provides a wide array of basic bricks, plates, and special elements that are perfect for constructing the foundational layers of your forced perspective scenes, from detailed foreground buildings to simpler background structures. Its versatility makes it a go-to for any serious MOC builder.
- Giant Lego Topic Set: Boasting 2195 pieces, this "Giant Lego Topic Set" offers another excellent source of building blocks. The assortment typically includes bricks in various sizes and colors, ideal for creating terrain, walls, and architectural details that can be scaled down effectively for distant elements. It's a treasure trove for builders looking to experiment with different scales.
- Giant Lego Dacta Basic Set: Another substantial set with 1417 pieces, this "Giant Lego Dacta Basic Set" is designed for creative building and exploration. It provides a solid foundation of standard bricks and plates, which are the bread and butter of forced perspective. Having multiple bulk sets like these ensures you have the raw materials to build vast, convincing landscapes without running out of essential components.
Specialty Pieces for Detail and Illusion
Beyond basic bricks, certain elements are incredibly useful:
- Plates (especially 1x1, 1x2, 2x2): Crucial for micro-scale details and intricate greebling in the foreground. They also help build up terrain gradually.
- Slopes and Curved Bricks: Essential for creating natural-looking terrain, mountains, and architectural angles that recede smoothly.
- Tiles (1x1, 1x2): Perfect for adding fine detail, texture, or creating smooth surfaces that can represent water or distant roads. The high piece count of mosaic sets like Lego Mosaic Dino, Lego Mosaic Cat, and Lego Mosaic Johnny Thunder makes them excellent sources for a vast quantity of 1x1 plates and tiles, which are incredibly valuable for detailed texture and color blending in any MOC, including forced perspective scenes.
- Small Plants/Foliage Elements: Tiny leaf pieces, flower studs, or even small round plates can represent distant trees or bushes.
- Microfigures or Minifigure Accessories: Sometimes a strategically placed microfigure or a small minifigure accessory can represent a distant person or vehicle better than a full minifigure.
Inspiration from Larger Builds
While not explicitly for forced perspective, larger, more complex sets can provide inspiration, advanced techniques, and a rich source of diverse parts that can be repurposed.
- Modular LEGO Store: This detailed set from the BrickLink Designer Program offers intricate architectural techniques and a wide variety of parts. Imagine it as a grand, detailed building in your foreground, making a smaller, simplified version of another modular building appear far off in the distance.
- Lego Minifigure and Lego Dragon: These large-scale sculptures are brilliant for playing with extreme scale. Place the giant Lego Minifigure in the foreground of a scene, and standard minifigures in the midground, to create a truly surreal and effective forced perspective. Similarly, the majestic Lego Dragon can dominate a landscape, making distant elements seem insignificant.
- LEGO Campus or LEGOLAND Park: These exclusive architectural models are packed with unique building techniques and a variety of pieces. They can serve as excellent references for creating detailed foreground structures or for sourcing interesting parts to add flair to your perspective builds.
Building Your First Forced Perspective MOC: A Step-by-Step Guide
Ready to try your hand at this magical technique? Follow these steps to create your own captivating illusion.
- Conceive Your Scene: What story do you want to tell? A vast desert, a bustling city, a deep forest? Sketch out your idea, paying attention to the focal point and the overall depth you want to achieve.
- Establish the Viewing Angle: Before you even place a brick, decide exactly where the viewer (or camera) will be positioned. This "sweet spot" is critical for the illusion to work. You might even build a simple stand or frame to fix your viewing point.
- Build the Foreground (Largest Scale): Start with the elements closest to the viewer. These should be the largest, most detailed, and most vibrant. This sets the initial scale for your scene. Use your bulk bricks from sets like to create substantial, intricate features.
- Construct the Midground (Intermediate Scale): Gradually reduce the scale and detail as you move backward. Elements here should partially overlap the background but be partially obscured by the foreground. Adjust colors to be slightly less saturated.
- Design the Background (Smallest Scale): For the farthest elements, use the smallest bricks and simplest shapes. Think micro-scale. Colors should be muted and lighter. Focus on silhouettes and general forms rather than intricate details. Sets like are great for providing simple, numerous parts for backgrounds.
- Integrate Transitions: Ensure a smooth visual flow between the different scale zones. Use slopes, curved elements, and gradual color changes to blend the sections seamlessly.
- Test and Adjust: Frequently check your build from the intended viewing angle. Does the illusion work? Are there any jarring transitions? Don't be afraid to rebuild sections until it looks perfect.
- Light and Photograph: Once satisfied, set up your lighting to enhance the depth. Take photos from your "sweet spot" to capture the magic of your forced perspective MOC.
Quick Comparison Table: Building Essentials for Forced Perspective
To help you choose the right foundational sets for your forced perspective projects, here's a comparison of some excellent high-piece-count options:
| Product Name | Item Number | Piece Count | Best For |
|---|---|---|---|
| Bonus Lego Basic Town | 9287-1 | 2542 | All-around foundational bricks, versatile building |
| Giant Lego Topic Set | 9452-1 | 2195 | Diverse brick assortment for landscapes and structures |
| Lego Mosaic Dino | k34432-1 | 2847 | Abundant 1x1 plates/tiles for color blending and detail |
| Giant Lego Dacta Basic Set | 9280-1 | 1417 | Solid basic brick supply for backgrounds and core structures |
| Lego Minifigure | 3723-1 | 1850 | Creating extreme scale contrast with a giant foreground element |
What to Consider When Buying for Forced Perspective
When assembling your brick collection for forced perspective builds, keep these factors in mind:
- Piece Count: You'll generally need a lot of bricks, especially basic ones. High-piece-count sets like the Bonus Lego Basic Town or Giant Lego Topic Set are excellent investments.
- Color Variety: A broad palette is crucial for achieving color progression from vibrant foregrounds to muted backgrounds. Look for sets with a good mix of primary, secondary, and neutral colors.
- Part Versatility: Prioritize sets that offer a good mix of plates, bricks, slopes, and tiles in various sizes. These are the workhorse elements for building different scales and textures.
- Specific Elements: If you have a particular vision, you might seek out specific elements like small plant pieces, micro-figures, or unique architectural details. Individual brick purchases from marketplaces like BrickLink can supplement your bulk sets.
- Budget: Forced perspective doesn't have to break the bank. Starting with one or two large basic sets and supplementing with smaller, specialized packs as needed is a cost-effective approach.
- Inspiration: Don't just buy bricks; buy sets that inspire you! Even a set like The LEGO Story or LEGO Inside Tour Anniversary Collection might spark an idea for a unique architectural element or a narrative for your scene.
Conclusion: Unlock Infinite Possibilities with LEGO Forced Perspective
LEGO forced perspective is more than just a trick; it's a powerful artistic tool that allows builders to transcend the physical limitations of bricks and space. By understanding and applying the principles of varying scale, color progression, and strategic placement, you can create breathtaking dioramas that captivate and inspire. Whether you're a seasoned MOC builder or just starting to explore advanced techniques, diving into forced perspective will undoubtedly elevate your LEGO creations.
Remember, the journey begins with a solid foundation of bricks. Explore versatile sets like the Bonus Lego Basic Town and Giant Lego Topic Set to stock your creative arsenal. Then, let your imagination run wild as you craft scenes that stretch into an illusory infinity. The world of LEGO is truly boundless when you know how to bend perception!
Master LEGO forced perspective to create stunning depth and scale illusions in your MOCs. Learn techniques, get essential brick recommendations, and build captivating dioramas.
LEGO forced perspective, LEGO MOCs, LEGO building techniques, depth illusion, scale illusion, LEGO dioramas, LEGO building tips, advanced LEGO, LEGO sets
Unlock the magic of LEGO forced perspective! Learn how to create breathtaking depth and scale illusions in your LEGO MOCs. This guide covers essential techniques, recommends the best LEGO sets for building, and provides step-by-step instructions to help you master this captivating building art. Discover how to make your LEGO creations appear larger, farther, and more realistic than ever before.
Q: What is a LEGO MOC?
A: A LEGO MOC stands for "My Own Creation." It refers to any LEGO model that a builder designs and constructs themselves, rather than following official LEGO instructions for a specific set. Forced perspective is a popular technique used in many advanced LEGO MOCs.
Q: Is forced perspective difficult to achieve in LEGO?
A: While it requires careful planning and a good eye, forced perspective is a technique that any builder can learn and master with practice. The initial challenge lies in understanding how to manipulate scale and detail, but the rewards are well worth the effort. Start with simple scenes and gradually increase complexity.
Q: What LEGO pieces are best for forced perspective?
A: The best pieces are versatile basic bricks, plates, and slopes in a wide range of sizes and colors. Small elements like 1x1 plates and tiles are essential for micro-scale background details, while larger standard bricks are perfect for foreground structures. Sets like Bonus Lego Basic Town and Giant Lego Topic Set are excellent for providing this variety.
Q: Can I use minifigures in a forced perspective build?
A: Absolutely! Minifigures are excellent for establishing scale. You would typically place them in the foreground at their standard size. To create the illusion of distant people, you might use smaller, unprinted elements (like a single 1x1 round plate) or specialized microfigures in the background. The key is consistency within each scale zone.
Q: How do I photograph a LEGO forced perspective MOC?
A: Photography is crucial. First, find the exact "sweet spot" viewing angle where your illusion works best. Use a tripod to keep your camera steady at this point. Ensure good, even lighting that doesn't create harsh shadows that might break the illusion. A shallow depth of field (where the background is slightly blurred) can also enhance the sense of depth, mimicking how our eyes perceive real-world distance.
Q: Do official LEGO sets use forced perspective?
A: While not often explicitly advertised, some official LEGO sets, especially larger display models or dioramas, subtly incorporate elements of forced perspective. For instance, a model of a city skyline might have simpler, smaller buildings in
Use Our Tools to Go Further
Get more insights about the sets mentioned in this article with our free LEGO tools