LEGO Robotics for Homeschool STEAM: A 36-Week Curriculum
Supporting Free Content
When you purchase through our links, we earn a small commission at no extra cost to you. As an eBay Partner, this helps us keep bringing you expert LEGO® reviews and guides. Thank you for your support!
A 36-week homeschool STEAM plan built on LEGO robotics, with weekly builds, code, science and math, a grading rubric, and what to buy now that LEGO has retired SPIKE Prime and MINDSTORMS Robot Inventor.
LEGO robotics provides a complete STEAM curriculum that homeschool families can implement without specialized teaching experience. This guide offers a structured 36-week program covering engineering principles, Python programming, physics concepts, and mathematical thinking, all through projects where the student builds and codes a robot.
Table of Contents
- Why LEGO Robotics for Homeschool?
- Choosing Your Platform
- 36-Week Curriculum Overview
- Semester 1: Foundations (Weeks 1-12)
- Semester 2: Intermediate (Weeks 13-24)
- Semester 3: Advanced (Weeks 25-36)
- Assessment & Documentation
- Free Resources & Community
- Budget Planning
Why LEGO Robotics for Homeschool STEAM?
Integrated Learning Across Subjects
| Subject | Skills Learned Through Robotics |
|---|---|
| Science | Physics (force, friction, momentum), Sensors (light, ultrasonic), Energy transfer |
| Technology | Programming, debugging, system design, troubleshooting |
| Engineering | Design process, constraints, optimization, mechanical advantage |
| Math | Geometry, ratios, algebra, graphing, unit conversion |
| Art | Creative problem-solving, aesthetic design, presentation |
Benefits for Homeschool Families
- Self-Paced Learning: Students work at own speed, perfect for homeschool flexibility
- Instant Feedback: Code runs immediately, showing cause-and-effect
- Real-World Skills: Python, engineering, and critical thinking transfer to careers
- Portfolio Building: Documented projects demonstrate learning for college applications
- Competition Opportunities: FIRST LEGO League provides socialization and teamwork
Choosing Your Platform
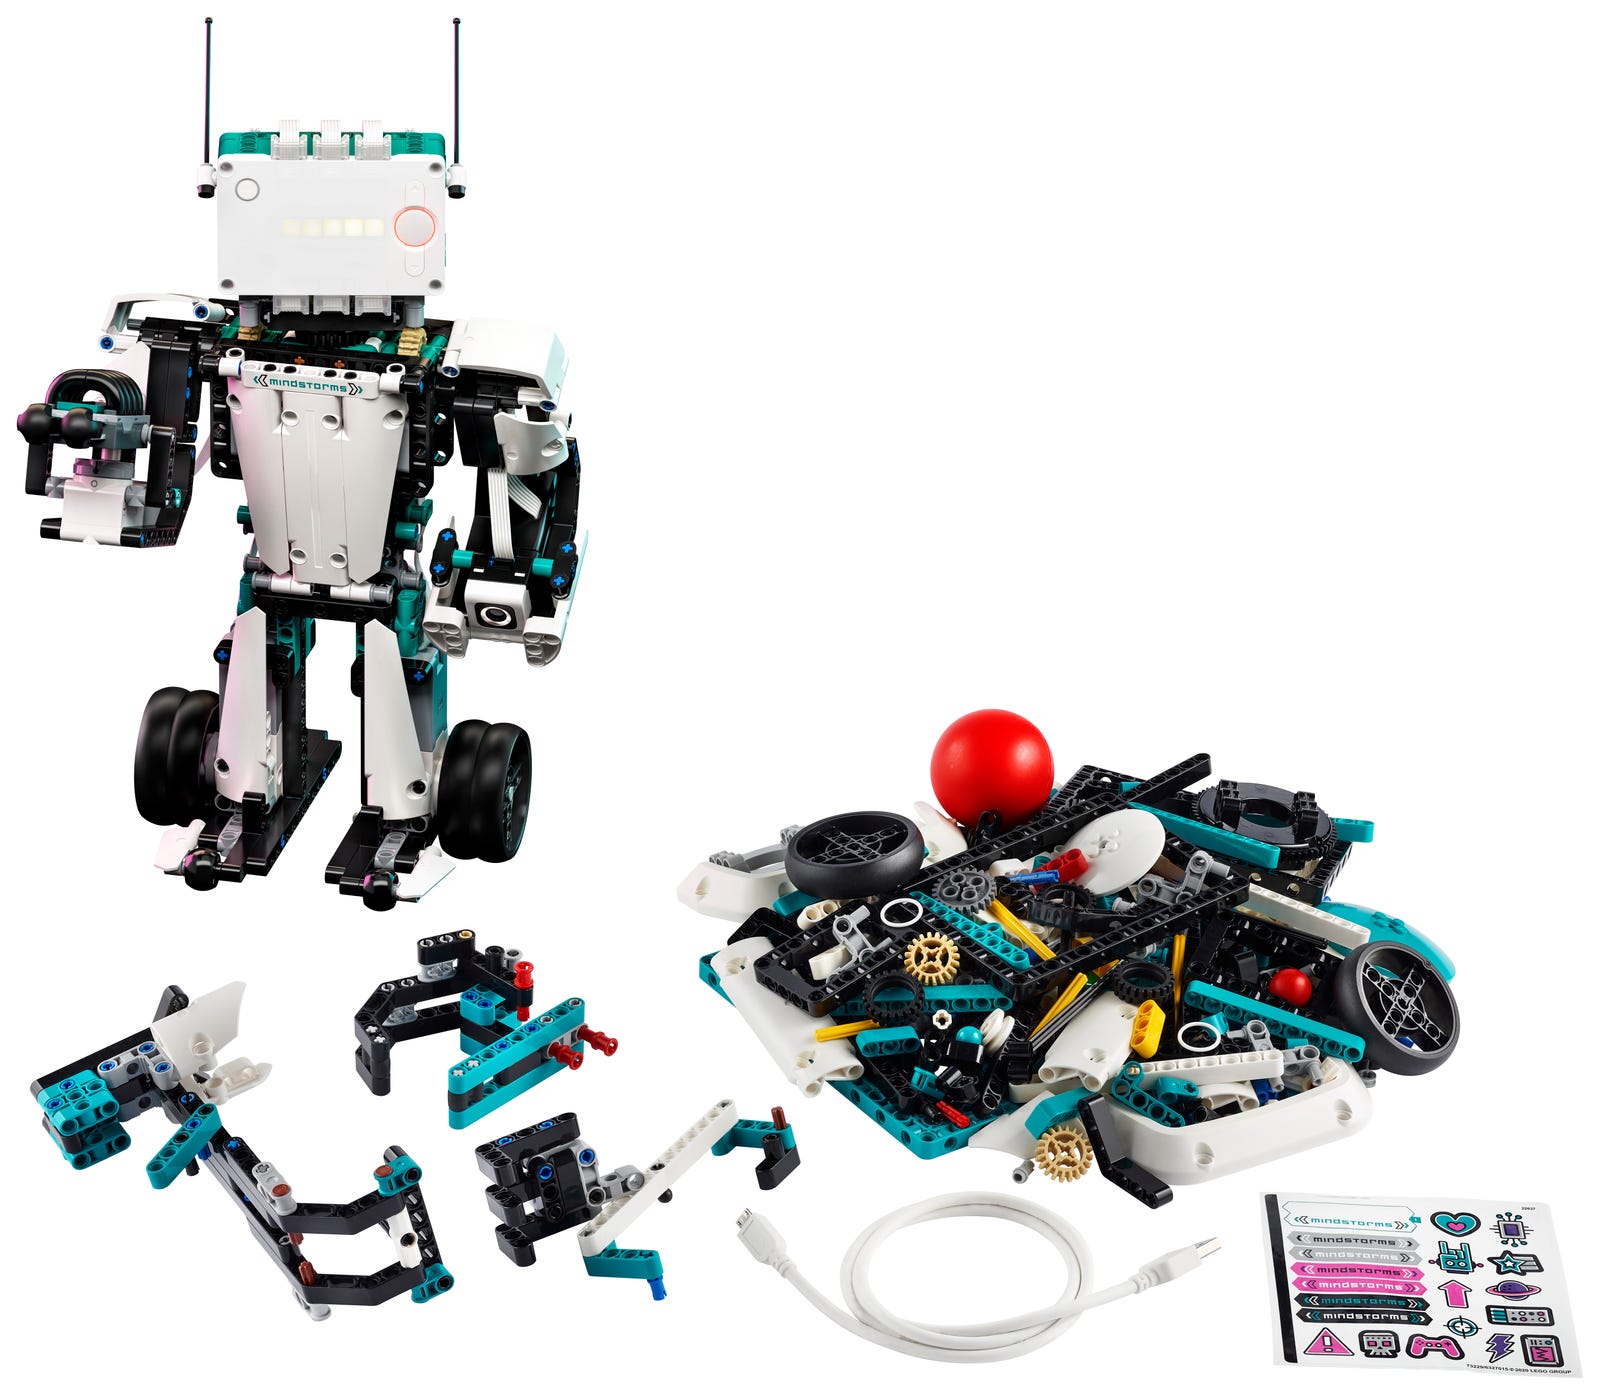
One fact shapes every recommendation on this page: LEGO has retired all of the robotics kits this curriculum was built around. MINDSTORMS Robot Inventor (51515) left the LEGO lineup at the end of 2022, and LEGO says its MINDSTORMS app is discontinued on October 1, 2026, with no further updates or support. LEGO Education then ended sales of its whole SPIKE portfolio, including SPIKE Prime (45678) and SPIKE Essential (45345), on June 30, 2026. That is less alarming than it sounds. The kits you already own keep working, you can still buy them secondhand, LEGO Education says it will keep fixing bugs in the SPIKE App (without adding new features) until June 30, 2031, and its SPIKE lessons stay online until then too.
SPIKE Prime vs MINDSTORMS Robot Inventor
| SPIKE Prime (45678) | MINDSTORMS Robot Inventor (51515) | |
|---|---|---|
| Status | Sales ended June 30, 2026; SPIKE App supported until June 30, 2031 | Retired at the end of 2022; LEGO's app discontinued October 1, 2026 |
| Designed for | Grades 6-8 classrooms | Sold as a 10+ retail set |
| Electronics | Six-port hub, three motors, color, distance and force sensors | Six-port hub, four motors, color and distance sensors |
| Coding | SPIKE App (Scratch-based Word Blocks and Python), or Pybricks | Pybricks; LEGO points owners to the SPIKE Prime App but does not guarantee a one-to-one experience |
| Free lessons | LEGO Education's SPIKE Prime units with teacher notes, online until June 30, 2031 | The models and activities in LEGO's app (it was a retail set, not a classroom product) |
| Parts | Fewer pieces, stored in sorting trays | Many more pieces, retail box |
Cost: Both kits are now mostly bought secondhand, where prices swing with condition and completeness, so compare several listings instead of trusting the first one. A complete kit with a healthy hub battery is worth paying a little more for. Before you buy, confirm that the hub powers on and charges, that every motor and sensor is present and responds (their cables are built in, so check them for damage), and that a charging cable is included.
Age fit: SPIKE Prime was designed for grades 6-8, and its lessons assume a middle schooler working with some guidance. Robot Inventor was sold as a 10+ set, but its bigger parts pool and open-ended projects suit an older, self-directed teen best, which is why the list below puts it at 14+. The two hubs are identical inside, so the skills and the Python code in this guide carry across both.
Curriculum availability: This is SPIKE Prime's biggest advantage. LEGO Education's sequenced SPIKE Prime units come with teacher notes and stay online until June 30, 2031. Robot Inventor was a retail set, so its structure came from the models and activities in LEGO's app rather than from lesson plans. For Python on either hub, Pybricks is a free, open-source firmware that runs the same code on both, and it is what the code samples in this guide use.
Buying new instead: LEGO Education now points schools to two newer lines: LEGO Education Science and LEGO Education Computer Science & AI, both sold in grade bands (K-2, 3-5 and 6-8). The Computer Science & AI kits began shipping in April 2026; each box holds LEGO bricks, interactive hardware, connection cards, charging cables and building instructions, and lessons are coded in LEGO Education Coding Canvas, a block-based tool that runs in a web browser or as an iOS app. Compare the hardware in the kit you choose with the sensors the weeks below use, since they were written for SPIKE Prime and Robot Inventor.
Competition: If FIRST LEGO League is part of your plan, check the current rules before you buy. LEGO Education says SPIKE kits stay eligible through the 2027-2028 season, after which changes to FIRST LEGO League mean SPIKE will no longer be eligible.
The age list below reflects what you can realistically get in 2026.
Recommendation by Age
- Ages 7-9: SPIKE Essential, designed for grades 1-5 (sales ended June 30, 2026, so buy secondhand), or a used LEGO BOOST kit (retired in 2022) for visual programming and creative play. With BOOST, confirm its app runs on your tablet before you buy.
- Ages 10-14: SPIKE Prime, designed for grades 6-8 (sales ended June 30, 2026; secondhand or remaining stock), with the most structured free lessons and FIRST LEGO League eligibility through the 2027-2028 season
- Ages 14+: MINDSTORMS Robot Inventor (retired in 2022; secondhand only) or SPIKE Prime, for advanced Python through Pybricks, more pieces and hobbyist projects
- Buying new: LEGO Education's Computer Science & AI kits, sold in grade bands (K-2, 3-5 and 6-8)
36-Week Curriculum Overview
This curriculum assumes 2-3 hours per week of robotics instruction, totaling 72-108 hours over the school year.
Learning Objectives by Semester
| Semester | Engineering Focus | Programming Focus | Math/Science Integration |
|---|---|---|---|
| 1 (Weeks 1-12) | Basic mechanisms, gears, sensors | Block coding, sequences, loops | Measurement, ratios, force |
| 2 (Weeks 13-24) | Complex builds, stability, efficiency | Python basics, variables, functions | Algebra, graphing, friction |
| 3 (Weeks 25-36) | Autonomous systems, optimization | Algorithms, PID, debugging | Calculus concepts, optimization |
Semester 1: Foundations (Weeks 1-12)
Week 1-2: Introduction to Robotics
- Build: Basic driving robot
- Code: Make it move forward, backward, turn
- Science: Force and motion basics
- Math: Measuring distances traveled
- Assessment: Robot race challenge
Week 3-4: Understanding Sensors
- Build: Add the color sensor to your driving robot, mounted low and pointing straight down, and the distance sensor facing forward.
- Code: Display live sensor readings, then write two programs: stop when something is closer than 10 cm, and stop when the robot reaches a strip of black tape.
- Science: The color sensor shines its own light and measures how much bounces back, so white paper reads high, black tape reads low, and shiny foil can surprise you. The distance sensor is ultrasonic: it sends out a sound pulse too high-pitched for us to hear and times the echo. Sound travels about 343 meters per second in room-temperature air, so the echo from a wall 1 meter away returns in roughly six thousandths of a second.
- Math: Record reflection readings for five different surfaces in a table and rank them. Take five readings of the same surface and average them.
- Assessment: Before every test, the student writes down a predicted reading, then explains any gap between the prediction and the result.
A good extra experiment: aim the distance sensor at a hardcover book, then at a pillow, then at the book tilted at a steep angle. Soft and angled surfaces send back a weaker echo or none at all, which explains why a robot can happily drive into the couch.
Week 5-6: Gears and Mechanical Advantage
- Build: A simple gear train on a Technic frame: a motor turns a small gear, which drives a larger one, with a pointer on the output axle so turns are easy to count.
- Code: Run the motor for exactly one rotation (360 degrees), then three, and count what the output axle does. Swap the gears and repeat.
- Science: Mechanical advantage. A small gear driving a large gear trades speed for turning force (torque); a large gear driving a small one does the opposite. Build a slow winch that lifts a small load and a fast spinner from the same parts to feel the difference.
- Math: Gear ratio is the number of teeth on the driven gear divided by the teeth on the driving gear. An 8-tooth gear driving a 24-tooth gear gives 24 ÷ 8 = 3, so the motor turns three times for every single turn of the output. Swap them and the output turns three times for every motor turn. A gear in between (an idler) changes direction but not the ratio, and two stages in a row multiply (3 × 3 = 9).
- Assessment: Set a target ratio that the gears in your kit can make, then have the student predict which gears to use, test it, and explain the result.
Your kit may not include every gear size, so count the teeth on what you have and let that set the problems. Counting teeth is fiddly, which is part of the lesson: put a small piece of tape on one tooth and count around.
Week 7-8: Programming Loops
- Build: Reuse the sensor robot from weeks 3-4.
- Code: One kind of loop per session: a counted loop ("repeat 4 times") that drives a square, a forever loop that keeps checking a sensor, and a "repeat until" loop that drives until the distance sensor sees a wall. Finish with an if/else inside a loop: if the color sensor sees black, turn; otherwise, keep driving.
- Logic: A condition is a statement that is either true or false ("the distance is less than 15 cm"). Have the student write each condition in plain English before coding it, and trace the program on paper, step by step, before running it.
- Math: To drive any regular shape, turn 360 ÷ (number of sides) at each corner: 90 degrees for a square, 120 for a triangle, 60 for a hexagon. Why 360? Because the robot finishes facing the way it started.
- Assessment: A "patrol" challenge: the robot drives a square over and over but stops the moment something comes within 15 cm.
Robots rarely turn exactly the angle you ask for on the first try, because wheels slip and surfaces differ. That is a feature in this unit: measuring the error and adjusting the number is debugging in its purest form.
Week 9-10: Design Challenge 1
The first open-ended challenge: build a robot that climbs the steepest ramp it can. A board propped on a stack of books makes a ramp you can raise one step at a time.
- Process: Work through the engineering design process as a loop: ask (what stops a robot on a slope?), imagine, plan, create, test, improve. Require at least three tested versions in the notebook.
- Variables to try: Gear ratio (from weeks 5-6), wheel size, wheels with and without tires, and where the weight sits. Change one thing per test so each result means something.
- Science: Friction, gravity and center of mass. A robot fails on a slope in one of three ways: the wheels spin (not enough grip), the motors stall (not enough torque), or it tips over backward (weight too far back). Working out which one happened is the real skill.
- Math: Measure the ramp's rise and run and calculate the slope (rise ÷ run). Older students can convert it to an angle with a protractor or the inverse tangent key on a calculator.
- Assessment: A results table of each design version against the steepest slope it climbed, plus a paragraph on why the winning design worked.
Week 11-12: Semester Project
The student picks a task, designs a robot for it, and presents the result. The only rules: it must use at least one sensor and one loop, and it must fit in two weeks.
- Project ideas: A bulldozer that pushes blocks out of a marked zone, an alarm that sounds when someone walks up to a door, a sorter that sends red bricks one way and blue bricks the other, or a drawing robot that holds a marker.
- Week 11: Write a one-page design brief (the problem, what "done" looks like, a sketch), get a parent's sign-off, then build and test a first version.
- Week 12: Improve it, film it working, and give a five-minute presentation: the goal, one problem solved along the way, and a live demo.
- Reflection: Three written answers: what worked, what failed and why, and what version 2 would change.
- Assessment: Score it with the rubric in the Assessment section below.
Your job as the parent is scope control. If the brief sounds like a month of work, help trim it to one core behavior done well.
Semester 2: Intermediate (Weeks 13-24)
Week 13-14: Transition to Python
Start by rewriting programs the student already understands. When the program is familiar, the syntax is the only new thing.
- Setup: SPIKE Prime owners can switch to Python inside the SPIKE App. The samples in this guide use Pybricks instead: a free, open-source firmware, installed from its website, that runs the same code on a SPIKE Prime or Robot Inventor hub. It needs Chrome or Edge on a computer, Chromebook or Android device; iPads and iPhones are not supported. Pybricks and the SPIKE App use different Python libraries, so code written for one will not run in the other.
- Code: Variables, print statements, comments (lines starting with #), counted for loops, and indentation, which Python uses in place of the way blocks nest inside each other.
- Math: Units. Pybricks measures driving distance in millimeters and turns in degrees, so older programs written in centimeters or rotations need converting.
- Assessment: Rewrite three Semester 1 programs in Python and explain each line out loud.
Here is the Semester 1 square, rewritten for Pybricks on a SPIKE Prime or Robot Inventor hub:
from pybricks.pupdevices import Motor
from pybricks.parameters import Port, Direction
from pybricks.robotics import DriveBase

left_motor = Motor(Port.A, Direction.COUNTERCLOCKWISE)
right_motor = Motor(Port.B)
robot = DriveBase(left_motor, right_motor, wheel_diameter=56, axle_track=112)

side_length = 300  # millimeters
corner = 90        # degrees

for side in range(4):
    print("Driving side", side + 1)
    robot.straight(side_length)
    robot.turn(corner)
Change the ports to match your robot, and measure your own wheel diameter and axle track (the distance between the points where the two wheels touch the ground), both in millimeters. If the robot drives backward, move Direction.COUNTERCLOCKWISE to the other motor; if it spins in place, your motors face the same way, so give both the same direction setting.
Week 15-16: Functions and Modularity
- Code: Define functions with def, pass information in through parameters, and send a result back with return. The square from weeks 13-14 becomes a polygon function that drives any regular shape.
- Engineering: Modularity. Engineers build machines from tested subassemblies (a gearbox, a gripper) so each part can be fixed or reused without touching the rest; functions do the same for code. Have the student build a small library of moves (drive a distance, turn, back away from a wall) to reuse in later projects.
- Math: The corner angle function below turns the weeks 7-8 formula into code. Add a second function that converts centimeters to millimeters, or rotations to degrees, and check its answers by hand.
- Assessment: Write three functions, each with a one-line comment saying what it does and what it needs, then build a new program only by calling them.
from pybricks.pupdevices import Motor
from pybricks.parameters import Port, Direction
from pybricks.robotics import DriveBase

left_motor = Motor(Port.A, Direction.COUNTERCLOCKWISE)
right_motor = Motor(Port.B)
robot = DriveBase(left_motor, right_motor, wheel_diameter=56, axle_track=112)


def corner_angle(sides):
    return 360 / sides


def polygon(sides, side_length):
    for side in range(sides):
        robot.straight(side_length)
        robot.turn(corner_angle(sides))


polygon(3, 200)
polygon(6, 100)
Week 17-18: Data Collection and Graphing
- Question: Does the robot really drive at the speed the code asks for? Write a hypothesis first, then run the experiment.
- Code: Drive toward a wall at a set speed while printing the time (in milliseconds) and the distance sensor reading (in millimeters) four times a second, using the sample below. Start at least 80 cm from the wall.
- Math: Transfer the printed pairs into a spreadsheet or onto graph paper, divide the times by 1000 to get seconds, and plot distance against time. The points should fall close to a straight line. Its slope is negative, because the distance shrinks, and its size is the robot's speed in millimeters per second.
- Science: The scientific method end to end: question, hypothesis, controlled experiment, data, conclusion. Repeat each run three times, and change only one thing (speed, floor surface, battery level) between sets of runs.
- Assessment: A one-page lab report with the graph, the calculated speed, and a sentence on what might explain any difference from the speed in the code.
from pybricks.pupdevices import Motor, UltrasonicSensor
from pybricks.parameters import Port, Direction
from pybricks.robotics import DriveBase
from pybricks.tools import wait, StopWatch

left_motor = Motor(Port.A, Direction.COUNTERCLOCKWISE)
right_motor = Motor(Port.B)
robot = DriveBase(left_motor, right_motor, wheel_diameter=56, axle_track=112)
eyes = UltrasonicSensor(Port.D)
watch = StopWatch()

robot.drive(100, 0)  # 100 millimeters per second, straight ahead
while watch.time() < 5000:
    print(watch.time(), eyes.distance())
    wait(250)
robot.stop()
If the measured speed is consistently off, the wheel diameter in the code is the first suspect, since Pybricks uses it to turn millimeters per second into motor speed. Measuring it more carefully and re-running the experiment is a satisfying way to close the loop.
Week 19-20: Line Following
- Build: Mount the color sensor low at the front, pointing straight down, just ahead of the wheels. Make a track from black electrical tape on white poster board, starting with gentle curves.
- Code, version 1: On/off control: if the sensor sees dark, steer one way; if it sees light, steer the other. It works, but the robot zigzags.
- Code, version 2: Proportional control (sample below). The robot follows the edge of the line, where the reading sits halfway between black and white. The error is how far the reading is from that target, and the steering is the error multiplied by a number called the gain.
- Math: A proportional relationship: steering equals gain times error, a straight line through the origin. Measure your own black and white readings first and calculate the target as their average.
- Assessment: Time three laps with on/off control and three with proportional control, then try three different gains and graph gain against lap time.
from pybricks.pupdevices import Motor, ColorSensor
from pybricks.parameters import Port, Direction
from pybricks.robotics import DriveBase
from pybricks.tools import wait

left_motor = Motor(Port.A, Direction.COUNTERCLOCKWISE)
right_motor = Motor(Port.B)
robot = DriveBase(left_motor, right_motor, wheel_diameter=56, axle_track=112)
line_sensor = ColorSensor(Port.C)

BLACK = 10   # your reading on the tape
WHITE = 90   # your reading on the board
target = (BLACK + WHITE) / 2
GAIN = 1.2
SPEED = 100  # millimeters per second

while True:
    error = line_sensor.reflection() - target
    robot.drive(SPEED, GAIN * error)
    wait(10)
Press the hub's center button to stop the program. If the robot swings away from the line instead of following it, it is tracking the other edge: make the gain negative. A higher gain reacts faster but wobbles more, a lower one is smoother but misses sharp curves, and finding the balance is the lesson.
Week 21-22: Robotic Arm Project
- Build: A two-joint arm (shoulder and elbow) with a gripper, one motor per joint. SPIKE Prime's three motors cover that exactly; Robot Inventor's four leave one spare for a rotating base.
- Code: Move each joint to a set angle using the motors' built-in position sensing, then chain the moves into a pick-and-place routine. Write a function that sends the arm to a named position ("home", "pick", "drop").
- Math: Angles and coordinates. Tape graph paper under or behind the arm (whichever plane it moves in), mark the shoulder as the origin, and record the (x, y) point the gripper reaches for each pair of joint angles. Students who know trigonometry can predict it: with arm segments of length L1 and L2, a shoulder angle a and an elbow angle b, x = L1 cos(a) + L2 cos(a + b) and y = L1 sin(a) + L2 sin(a + b).
- Engineering: Precision and repeatability. Send the arm to the same point ten times, mark where it lands each time, and measure the spread. Loose joints and play between gear teeth (backlash) show up immediately, and stiffening the build is the fix.
- Assessment: Move three bricks from marked starting spots to a target square without anyone touching them by hand.
Week 23-24: Mid-Year Showcase
- Plan: Invite family, friends, your co-op, or grandparents on a video call. Each project gets about three minutes: what it does, one problem solved along the way, and a live demo.
- Practice: Rehearse at least once, including what to do if the demo fails. A backup video of the robot working takes the pressure off.
- Portfolio: Choose the three best projects so far. For each, save the final code, a short video, the notebook pages, and a paragraph on what was learned.
- Reflection: Put a week 1 program next to a week 20 program and write about the difference.
- Parent check-in: Review the Semester 1 and 2 skills together and decide whether Semester 3 runs at full pace or repeats a unit first.
Semester 3: Advanced (Weeks 25-36)
Week 25-27: Autonomous Navigation
- Week 25, obstacle avoidance: Drive until the distance sensor sees something within 15 cm, back up, turn, and carry on. Then improve it: before turning, look both ways and turn toward the side with more room.
- Week 26, flowcharts and decision trees: Before writing any code, draw the robot's decisions as a flowchart, with diamonds for questions ("wall ahead?") and rectangles for actions. A decision tree lists every combination of sensor answers and the action for each. The student should be able to walk you through the chart before writing a line of code.
- Week 27, maze solving: Build a maze on a grid of equal cells (each a bit longer than the robot) using books or cardboard walls. Program the right-hand rule: at every cell, look right and go if it is open; otherwise look ahead; otherwise look left; otherwise turn around. With a single forward-facing distance sensor, "looking" means turning, measuring, and deciding.
- Algorithm design: Following one wall reliably finds the exit when all the walls connect to the outer edge and the robot starts at the entrance, but a free-standing section of wall can leave it circling forever. Build one on purpose and ask the student why it fails and what might work instead.
- Assessment: The flowchart, a successful run through the maze, and a written comparison of two strategies.
Week 28-30: PID Control Systems
- Concept: A feedback loop measures, compares the result to a goal, corrects, and repeats. A home thermostat and a car's cruise control work this way, and so does the proportional line follower from weeks 19-20.
- P, I and D: The proportional term reacts to how big the error is right now. The integral term adds up the error over time, which fixes a steady drift to one side. The derivative term reacts to how fast the error is changing, which calms a wobble before it grows.
- Calculus connection: The derivative term is a rate of change, estimated by subtracting the last error from the current one. The integral term is the area under the error curve, estimated with a running total. Younger students can use plain words: how big is the mistake, how long has it lasted, and how fast is it changing?
- Tuning: Start with the integral and derivative gains at zero. Raise the proportional gain until the robot wobbles, back it off a little, then add derivative gain to calm the wobble. Add a very small integral gain only if the robot keeps drifting to one side, because the running total grows quickly.
- Assessment: A tuning log (each set of gains, the lap time, and a note on how smooth the run looked) plus a short explanation of what each term did.
The sample below extends the weeks 19-20 line follower with all three terms. The gains are starting points to tune on your own track, not answers.
from pybricks.pupdevices import Motor, ColorSensor
from pybricks.parameters import Port, Direction
from pybricks.robotics import DriveBase
from pybricks.tools import wait

left_motor = Motor(Port.A, Direction.COUNTERCLOCKWISE)
right_motor = Motor(Port.B)
robot = DriveBase(left_motor, right_motor, wheel_diameter=56, axle_track=112)
line_sensor = ColorSensor(Port.C)

target = 50   # halfway between your black and white readings
KP = 1.2      # tune this first
KI = 0        # leave at zero unless the robot drifts to one side
KD = 0        # raise this once KP is tuned
SPEED = 150   # millimeters per second

integral = 0
last_error = 0

while True:
    error = line_sensor.reflection() - target
    integral = integral + error
    derivative = error - last_error
    robot.drive(SPEED, KP * error + KI * integral + KD * derivative)
    last_error = error
    wait(10)
Week 31-32: Competition Preparation (Optional)
A timing note first: FIRST LEGO League seasons launch in late summer, so on a September-to-May school year these weeks land after most of a season's events. Use them to get ready for next season, a local robotics event, or a tournament you run with your co-op. As covered in Choosing Your Platform, the competition landscape is changing after the 2026-2027 season, so check which program and hardware rules apply before you register.
- Know the format: FIRST describes FIRST LEGO League Challenge teams as 2 to 10 students ages 9 to 16 (grades 4-8), with two adult coaches. Teams program a robot to complete missions on a themed playing field in two-and-a-half-minute matches, work on an innovation project that tackles a real-world problem, and are also judged on robot design and the FIRST Core Values: discovery, innovation, impact, inclusion, teamwork and fun.
- Practice like it counts: Invent three or four missions on your own mat and set a timer for two and a half minutes. List each mission, its points, and how long it takes, then plan the best order.
- Teamwork: Form a team with other homeschool families or your co-op, and rotate roles (builder, programmer, researcher, presenter) so every child tries each one.
- Presentation: Practice explaining the robot's design to an adult who has not seen it, then answering their questions. Judging covers how a team designed its robot and worked together, not just the match score.
- Assessment: A mission plan, a log of practice-run scores, and a short team presentation.
Week 33-35: Final Capstone Project
The capstone runs the full engineering design process over three weeks, ideally for a real person with a real problem.
- Week 33, define and plan: Interview the "client" (a sibling, grandparent or neighbor), write requirements and constraints (parts in the kit, three weeks, safe to run indoors), sketch three different ideas, and pick one with a decision matrix: list the criteria, weight them by importance, and score each idea.
- Week 34, build and test: Get a first working version running by midweek. Keep a test log (date, what was tested, the result, what changed) and aim for at least two improvement cycles.
- Week 35, refine and document: The final build, commented code, a one-page user guide, and a short video. Rehearse the Week 36 presentation.
- Project ideas: A sorter for a mixed pile of bricks, a drawing machine that plots shapes, a camera slider for smooth videos, a model drawbridge or elevator with a sensor safety stop, or a reaction-time game.
- Assessment: The full rubric below, with extra weight on the engineering notebook and test log.
Week 36: End-of-Year Presentation
- Portfolio review: Sit down together with the notebook, the code folder and the videos. Put the very first program from Week 1 next to the capstone and talk about the difference.
- Skill demonstrations: A short practical check, without notes: calculate how many wheel rotations it takes to drive one meter (distance ÷ (π × wheel diameter)) and prove it on the floor, explain a gear ratio using real gears, write a function from scratch, and tune a line follower.
- Presentation: The capstone presentation to family or your co-op, followed by questions.
- Reflection: What was hardest this year, which project the student is proudest of, and what they want to learn next (more Python, electronics, a competition team).
- Records: Keep the portfolio, an hours log and the scored rubrics together. If your state asks for homeschool portfolios or evaluations, this is your evidence, so check its rules for what to keep.
Assessment & Documentation
Portfolio Components
- Engineering Notebook: Sketches, measurements, design iterations
- Code Repository: Organized folder of Python programs with comments
- Video Documentation: Robots in action, explanations of design choices
- Reflection Essays: What worked, challenges overcome, lessons learned
- Math/Science Connections: Documented equations, measurements, experiments
Grading Rubric
Score each area from 1 to 4 on every major project. Share the rubric before the project starts, so the student knows what good looks like.
| Area | 1: Beginning | 2: Developing | 3: Proficient | 4: Advanced |
|---|---|---|---|---|
| Engineering process | Builds without a plan and stops after the first attempt | Sketches a plan and makes changes, but does not record why | Plans, tests and records at least two iterations, changing one thing at a time | Tests systematically, uses data to choose between designs, and explains the trade-offs |
| Code quality | Program runs only with help | Program works but is hard to follow or repeats itself | Works reliably, uses loops and functions, with clear names and comments | Well organized and reusable, handles unexpected sensor readings, and the student can explain every line |
| Documentation | Few or missing notebook entries | Entries exist but skip dates, sketches or results | Dated entries with sketches, measurements, test results and reflections | Someone else could rebuild the robot and follow the reasoning from the notebook alone |
| Presentation | Demo only, with no explanation | Explains what the robot does | Explains how and why it works, including a problem that was solved | Clear and confident, answers questions well, and connects the project to the math or science behind it |
Proficient in every area adds up to 12 out of 16. If you keep transcripts, convert the averages to your own grading scale and file the scored rubrics in the portfolio.
Free Resources & Community
- LEGO Education Lesson Library - free lessons, including the SPIKE units (online until June 30, 2031)
- FIRST LEGO League Resources - Competition materials
- Community: homeschool co-ops, library makerspaces and local robotics teams are good places to find teammates and share kits, and the Pybricks project answers Python questions in its public discussions on GitHub
- Our Programming Tutorials
Budget Planning
One-Time Costs
- The robotics kit: by far the biggest cost. SPIKE Prime and Robot Inventor are retired, so you will mostly be buying secondhand, where prices vary widely with condition and completeness. Run through the checklist in Choosing Your Platform before paying, and set a little aside in case a part turns out to be missing.
- A device to code on: LEGO Education lists Windows, macOS, Chromebook, Android and iOS for the SPIKE App, while Pybricks needs Chrome or Edge on a computer, Chromebook or Android device. Most families can use a device they already own.
- Extra motors or sensors (optional): worth buying only once a project actually needs them. With SPIKE retired, extra SPIKE motors and sensors are mostly secondhand buys too.
- Challenge surfaces: white poster board, black electrical tape and a board for the ramp cover every activity in this guide. A printed competition mat is optional.
Recurring Costs
- Very little: the kit is reusable year after year, and the lessons and software used in this guide are free.
- Supplies: tape and poster board for new tracks and challenges.
- Competition (optional): FIRST LEGO League has registration and event fees. Check FIRST's website for the current fees and what a team needs to buy before you commit.
The short version: the kit is the budget. Everything else in this curriculum runs on free lessons, free software and household supplies.
Both kits below are retired, so any listing you find will be secondhand or a seller's remaining stock. Check it against the buying checklist in Choosing Your Platform before you pay.
Get MINDSTORMS Robot Inventor Get SPIKE Prime for Education
What Success Looks Like
Success in this curriculum is not a trophy or a perfect robot. By the end of the year, look for these habits:
- Planning before building: The student sketches and predicts before reaching for parts.
- Calm debugging: When a robot fails, they change one thing at a time instead of starting over.
- Math on demand: Ratios, averages, slopes and angles come up because a robot needed them, not because a worksheet said so.
- Explaining their work: They can walk a visitor through a project, including what went wrong along the way.
- Reading code: They can read a short Python program and predict what the robot will do.
If motivation dips mid-year, that is normal. Shorten a unit, let the student choose the next build, or invite a friend to join; robotics works best when the child owns the problem. And if robotics turns out not to be their thing, the notebook habits, the math and the debugging mindset still carry over into everything else.
Use Our Tools to Go Further
Get more insights about the sets mentioned in this article with our free LEGO tools