
AI LEGO Sorting Machine: Raspberry Pi and OpenCV Guide
Supporting Free Content
When you purchase through our links, we earn a small commission at no extra cost to you. As an eBay Partner, this helps us keep bringing you expert LEGO® reviews and guides. Thank you for your support!
A LEGO sorter is a feeder, a camera, a classifier and a gate. This guide builds each part with a Raspberry Pi, the Build HAT and OpenCV, with working code for capture, detection, colour and shape features, a trained model or the Brickognize recognition API, and the sorting gate.
A LEGO sorting machine is four problems in a row: feed the pieces one at a time, photograph each one under even light, decide what it is, and tip it into the right bin. A Raspberry Pi handles the camera and the decisions, OpenCV finds and measures each piece, and LEGO motors on the Raspberry Pi Build HAT can run the belt, the feeder and the gate. This guide builds each stage with working code, from colour sorting, which needs no machine learning, to identifying exact parts with a trained model or a recognition API.
How the machine fits together
Bulk hopper  ->  Vibrating feeder  ->  Belt  ->  Camera  ->  Raspberry Pi (OpenCV)
                                                             |
                                                  Build HAT motors: belt, feeder, gate
                                                             |
Bin 1 Bin 2 Bin 3 Bin 4- Feeder: shakes pieces apart and drops them onto the belt one at a time. This is the hardest stage to get reliable.
- Imaging: a camera above a white belt, with diffuse light so pieces cast no hard shadows.
- Classifier: colour thresholds, shape features, a trained model or a recognition API.
- Gate: a motor that swings a flap or rotates a chute to the right bin.
Parts
- A Raspberry Pi 4 or 5 and its power supply.
- A camera: a Raspberry Pi camera module for pieces that stop under the lens, or Raspberry Pi's Global Shutter Camera for a belt that keeps moving: Raspberry Pi cameras on Amazon.
- The Raspberry Pi Build HAT with its 8V power supply, to drive LEGO motors from Python: the Build HAT on Amazon. Our Build HAT guide covers its setup.
- LEGO motors for the belt, the feeder and the gate.
- Even lighting: an LED strip behind a diffuser, or a small light box, and a white belt or background: LED light strips on Amazon.
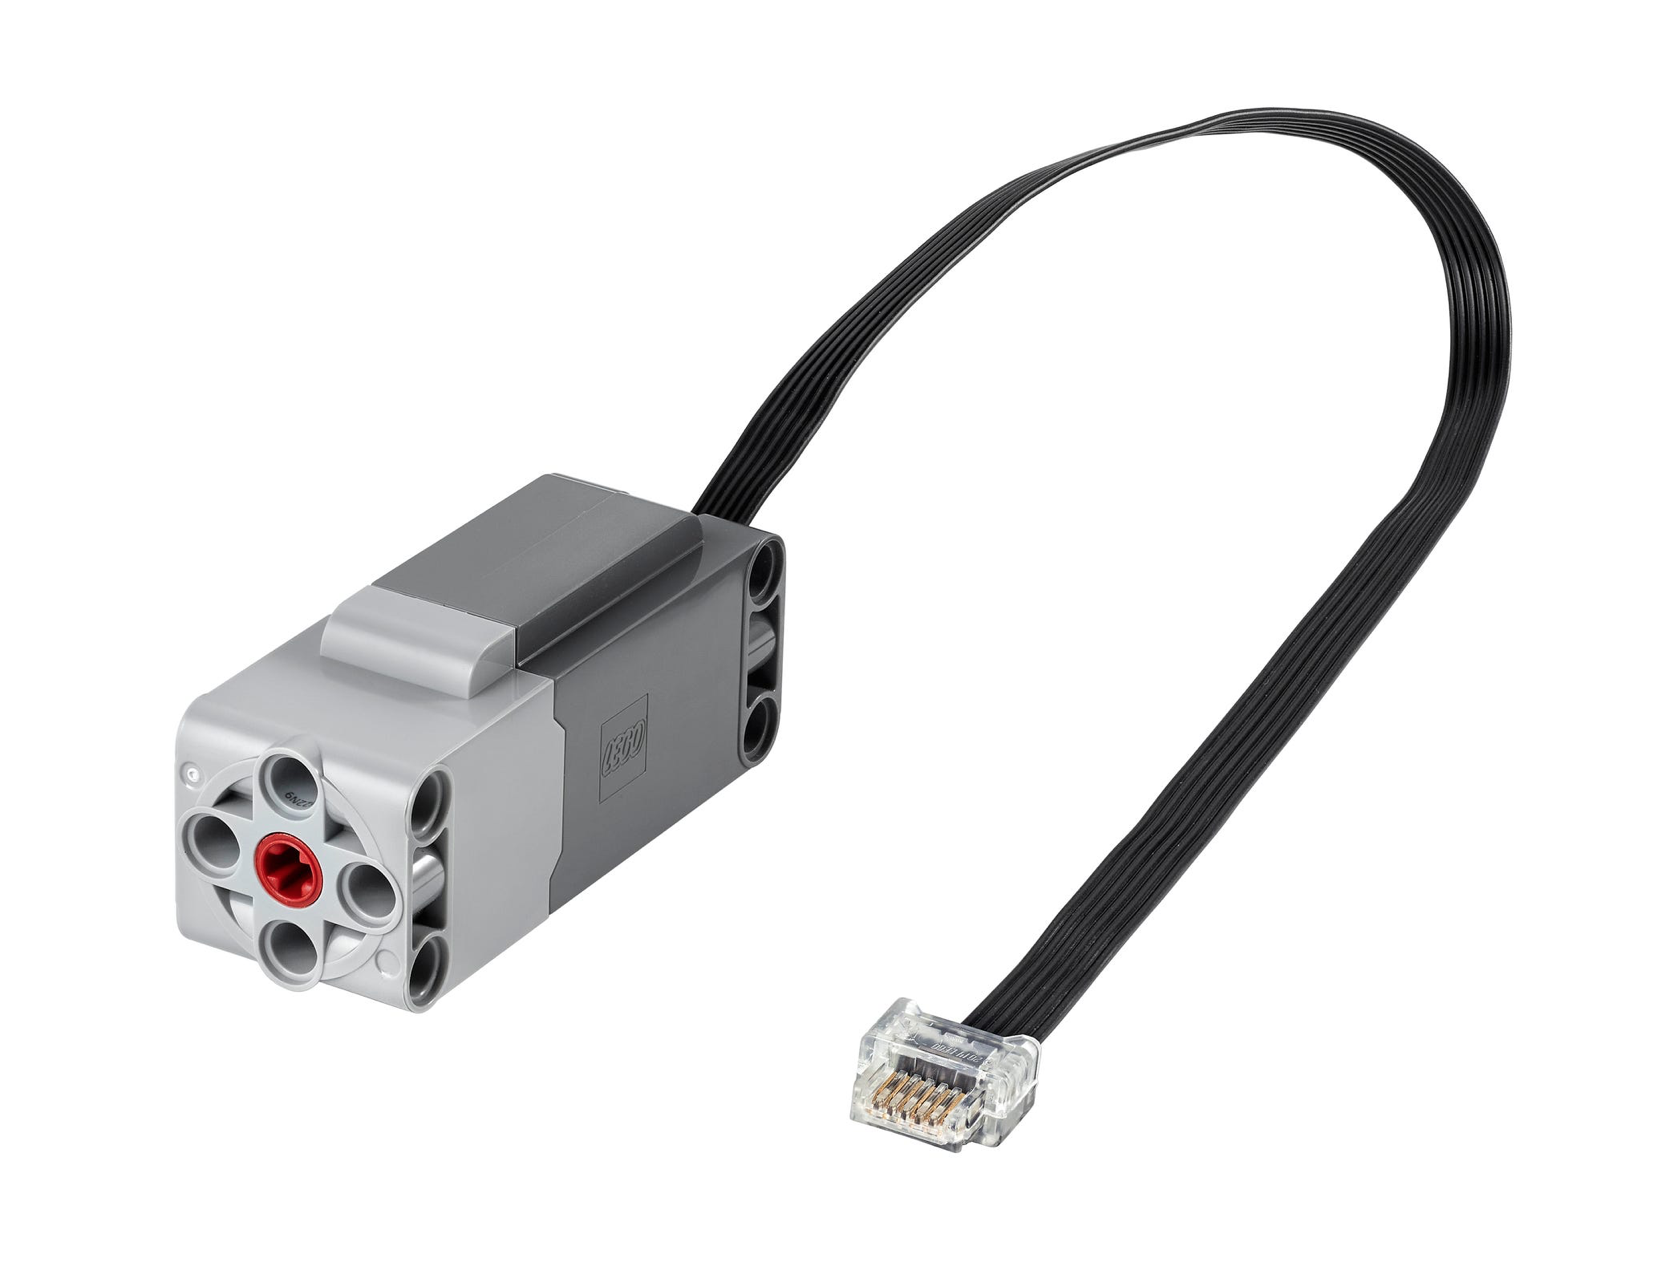
The Technic Large Motor, which plugs into a Build HAT port and reports its position, useful for a belt drive or a sorting gate that has to stop at set angles.
The feeder
A common approach is a ramp shaken by a motor with an off-centre weight on its axle, which loosens pieces that cling together and walks them toward the belt. Running it in pulses helps separate pieces that arrive in a clump:
from buildhat import Motor
import time

feeder_motor = Motor('B')

def start_feeder(speed=50):
    feeder_motor.start(speed)

def stop_feeder():
    feeder_motor.stop()

def pulse_feeder(on_time=0.5, off_time=0.5, cycles=10):
    for _ in range(cycles):
        feeder_motor.start(80)
        time.sleep(on_time)
        feeder_motor.stop()
        time.sleep(off_time)
Capturing images
Picamera2 is the camera library on current Raspberry Pi OS. Ask for the RGB888 format, which Picamera2 delivers in the blue, green, red order OpenCV expects, so frames go straight into OpenCV without conversion:
from picamera2 import Picamera2

picam2 = Picamera2()
config = picam2.create_preview_configuration(main={"size": (640, 480), "format": "RGB888"})
picam2.configure(config)
picam2.start()

def capture_frame():
    return picam2.capture_array()
Without an explicit format, a preview configuration defaults to the four-channel XBGR8888 format, so setting RGB888 gives the three-channel frames the rest of this code expects.
Finding the piece
Against a white belt, a piece is anything darker than the background. Threshold the image, find the outlines and keep the largest one, ignoring specks of dust:
import cv2

MIN_AREA = 500

def detect_part(frame):
    gray = cv2.cvtColor(frame, cv2.COLOR_BGR2GRAY)
    _, mask = cv2.threshold(gray, 200, 255, cv2.THRESH_BINARY_INV)
    contours, _ = cv2.findContours(mask, cv2.RETR_EXTERNAL, cv2.CHAIN_APPROX_SIMPLE)
    if not contours:
        return None
    largest = max(contours, key=cv2.contourArea)
    if cv2.contourArea(largest) < MIN_AREA:
        return None
    return largest
The threshold of 200 and the minimum area depend on your lighting and camera height; print the values for a few pieces and adjust. White and transparent pieces are the hardest to see against a white belt, so some builders use a backlit or coloured background for them.
Measuring colour and shape
import cv2
import numpy as np

def extract_features(frame, contour):
    x, y, w, h = cv2.boundingRect(contour)
    roi = frame[y:y + h, x:x + w]

    mask = np.zeros(roi.shape[:2], dtype=np.uint8)
    cv2.drawContours(mask, [(contour - [x, y]).astype(np.int32)], 0, 255, -1)

    hsv = cv2.cvtColor(roi, cv2.COLOR_BGR2HSV)
    hue, sat, val, _ = cv2.mean(hsv, mask=mask)

    hull_area = cv2.contourArea(cv2.convexHull(contour))
    rect = cv2.minAreaRect(contour)
    long_side, short_side = max(rect[1]), min(rect[1])

    return {
        'hue': hue, 'sat': sat, 'val': val,
        'aspect_ratio': long_side / short_side if short_side else 0,
        'solidity': cv2.contourArea(contour) / hull_area if hull_area else 0,
        'hu_moments': cv2.HuMoments(cv2.moments(contour)).flatten(),
        'roi': roi,
    }
OpenCV measures hue from 0 to 179. Using the minimum-area rectangle rather than the upright bounding box keeps the aspect ratio the same however the piece lands.
Classifying
By colour
The simplest sorter needs nothing more. The ranges below are a starting point to tune under your own light:
def classify_by_color(f):
    hue, sat, val = f['hue'], f['sat'], f['val']
    if sat < 50:
        if val > 200:
            return 'white'
        if val < 60:
            return 'black'
        return 'gray'
    if hue < 10 or hue >= 170:
        return 'red'
    if hue < 25:
        return 'orange'
    if hue < 35:
        return 'yellow'
    if hue < 85:
        return 'green'
    if hue < 130:
        return 'blue'
    return 'other'
By shape features
Hu moments describe an outline in a way that does not change when the piece rotates. Photograph a few examples of each part you want to recognise, store their features, and match new pieces to the nearest example:
import numpy as np

KNOWN_PARTS = {}

def add_example(part_id, features):
    KNOWN_PARTS.setdefault(part_id, []).append(features['hu_moments'])

def match_shape(features):
    best_id, best_dist = None, float('inf')
    for part_id, examples in KNOWN_PARTS.items():
        for hu in examples:
            dist = np.linalg.norm(np.log(np.abs(features['hu_moments']) + 1e-12) - np.log(np.abs(hu) + 1e-12))
            if dist < best_dist:
                best_id, best_dist = part_id, dist
    return best_id, best_dist
Comparing the logarithms of the moments keeps the very small higher moments from being ignored. A top-down outline cannot tell a brick from a plate of the same footprint, so for those you need a side view, height, or one of the approaches below.
With a trained model
To identify many different parts, train an image classifier on photos taken in your own machine, under its own
light, then run it on the Pi with the LiteRT (formerly TensorFlow Lite) runtime. Google's LiteRT documentation
installs it with python3 -m pip install tflite-runtime; the newer ai-edge-litert package
offers the same interpreter. There is no ready-made LEGO model to download, and the model's accuracy is whatever
your test set says it is.
import cv2
import numpy as np
import tflite_runtime.interpreter as tflite

interpreter = tflite.Interpreter(model_path="lego_classifier.tflite")
interpreter.allocate_tensors()
input_details = interpreter.get_input_details()
output_details = interpreter.get_output_details()

CLASSES = ["3001", "3003", "3004", "3023"]

def classify_with_model(roi):
    height, width = input_details[0]['shape'][1:3]
    rgb = cv2.cvtColor(cv2.resize(roi, (width, height)), cv2.COLOR_BGR2RGB)
    data = np.expand_dims(rgb.astype(np.float32) / 255.0, axis=0)
    interpreter.set_tensor(input_details[0]['index'], data)
    interpreter.invoke()
    scores = interpreter.get_tensor(output_details[0]['index'])[0]
    return CLASSES[int(np.argmax(scores))], float(np.max(scores))
Replace CLASSES with your model's labels in training order, and match the input scaling to how the
model was trained; the divide by 255 assumes a float model trained on RGB images scaled to 0 to 1.
With the Brickognize API
If you would rather not train a model, Brickognize offers a public recognition API, documented at api.brickognize.com/docs. Send a photo of one part and it returns candidate part numbers and names with a confidence score from 0 to 1:
import cv2
import requests

def identify_with_brickognize(roi):
    ok, jpeg = cv2.imencode('.jpg', roi)
    if not ok:
        return None
    files = {'query_image': ('part.jpg', jpeg.tobytes(), 'image/jpeg')}
    response = requests.post('https://api.brickognize.com/predict/parts/', files=files, timeout=10)
    response.raise_for_status()
    items = response.json()['items']
    if not items:
        return None
    best = items[0]
    return best['id'], best['name'], best['score']
Each call is a network round trip, so this suits a sorter that pauses each piece under the camera, or labelling your own photos to train a model. Read the service's terms before running a large collection through it.
The sorting gate
A LEGO motor that reports its position makes a simple gate: rotate a chute or a flap to one of a few angles. The
Build HAT's run_to_position() takes an absolute angle from -180 to 180:
from buildhat import Motor
import time

gate_motor = Motor('C')

BIN_ANGLES = {1: 0, 2: 45, 3: 90, 4: 135}
BIN_FOR_CLASS = {'red': 1, 'blue': 2, 'yellow': 3}

def sort_part(part_class):
    bin_number = BIN_FOR_CLASS.get(part_class, 4)
    gate_motor.run_to_position(BIN_ANGLES[bin_number], speed=50)
    time.sleep(0.3)
Putting it together
The main loop, using the functions above:
from buildhat import Motor
import time

conveyor = Motor('A')

def main():
    conveyor.start(30)
    start_feeder(40)
    try:
        while True:
            frame = capture_frame()
            contour = detect_part(frame)
            if contour is not None:
                features = extract_features(frame, contour)
                part_class = classify_by_color(features)
                print('Detected:', part_class)
                sort_part(part_class)
            time.sleep(0.1)
    except KeyboardInterrupt:
        pass
    finally:
        conveyor.stop()
        stop_feeder()
        picam2.stop()

if __name__ == '__main__':
    main()
The camera sees the piece before it reaches the gate, so in a real build you also need the delay between the two, from the belt speed and the distance, before switching the gate.
What makes the difference
- Feeding one piece at a time. Two pieces touching look like one odd shape to any classifier.
- Diffuse, constant light. Shadows change the outline, and daylight changes the colours through the day.
- A plain background that contrasts with the pieces you sort most.
- The right shutter. A global shutter camera, or stopping the belt, avoids motion smear.
- Smaller images. Detection and features run faster on a 640 by 480 frame than at full resolution.
If you would rather sort by hand with a plan, our Sorting Planner splits the parts from a list of sets into bins, and how to sort and organize LEGO bricks compares sorting systems.
Use Our Tools to Go Further
Get more insights about the sets mentioned in this article with our free LEGO tools